

Downloading & Installing PyCharm Pro
Foreword
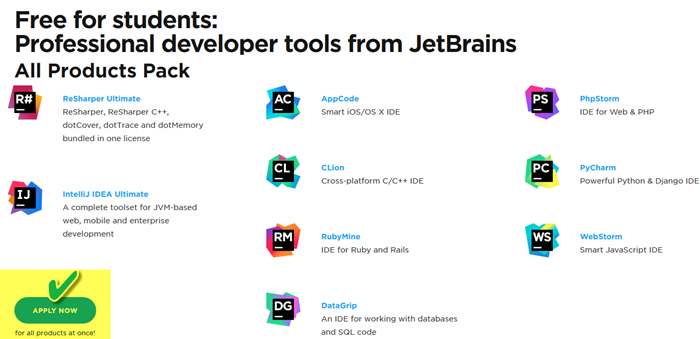
At the time of this writing, there are at least three versions of PyCharm: Professional, Community, and Educational. For this course, we will use the PyCharm Educational which is free for educational purposes.
Download PyCharm
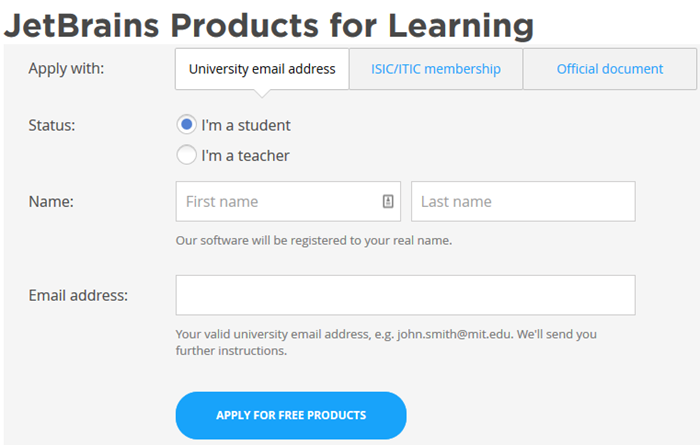
PyCharm is free for students with valid higher education email addresses. If you want PyCharm for free, you will need to supply your ACC email address in a step below. Navigate to the PyCharm Students page and select Apply Now.
The instructions below show the steps for installing on Windows. The steps for OS X and Linux are analogous. Populate the form and select Apply for Free Products. If for some reason you prefer not to supply your edu email to receive the free JetBrains products, you may use the PyCharm programs running on PCs in the ACC Northridge computer science computer lab.
Expect an email from JetBrains within 24 hours (usually much sooner). If you do not receive an email, submit a support request on the JetBrains site. Follow the instructions in the email to download PyCharm Pro. Double-click the .exe file that was downloaded. After the PyCharm installation is complete, this .exe can be deleted. I download to the desktop so the icon looks like this:

Installing PyCharm
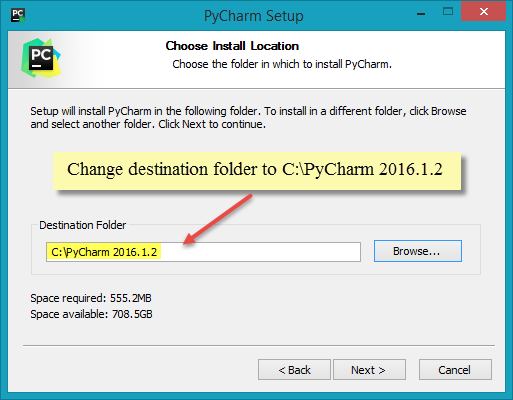
In the next dialog, you are prompted for the installation location. I recommend changing the default to an alternative location like that shown. Programs installed in the Program Files (x86) folder are subject to Microsoft's UAC (User Account Control) which may induce issues in the future. Most developers prefer to install development tools at C:\ due to the problems associated with installing in Program Files (x86). Click Next.
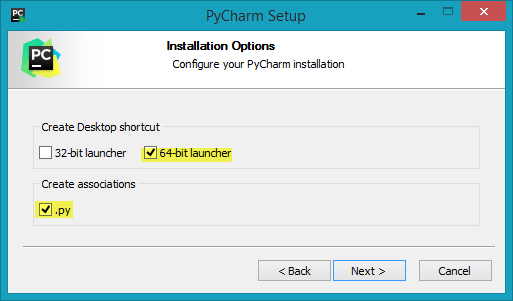
Choose to create a desktop icon and select the Python 3.5 (or latest stable) version. I create the desktop icon so I can quickly open PyCharm later. And, in a later step, after you have opened PyCharm, I recommend that you R-click the icon in the taskbar and select 'Pin to Taskbar' for easy access. Note: you may prefer to continue to have .py files associated with Python instead of PyCharm. This enables you to run files by double-clicking them in File Explorer or by typing just the file name at the command line. On the other hand, if the .py box below is checked, PyCharm will open when a .py file is double-clicked or run from the command line. Make the selection that best supports your desired workflow.
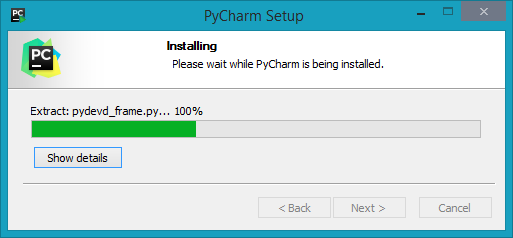
The installation begins and only requires one minute or so.
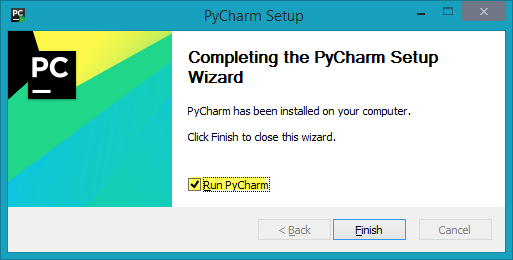
Select Run PyCharm | Finish.
PyCharm starts and opens the dialog below. Make the appropriate selection (the 'I do not' choice is appropriate unless you want to use settings from a previous version).
It is not unusual to reinstall Python and PyCharm due to configuration issues and other problems that can occur with development tools. Before reinstalling, be sure to uninstall both Python and PyCharm using Control Panel | Programs and Features. Furthermore, when presented with the ‘Complete Installation’ dialog box like that shown below, I recommend selecting the ‘I do not…’ option to start with a clean installation. Otherwise, some of the configuration issues that necessitated the reinstallation may be retained. However, if performing a standard upgrade from one version to a later version, it may be useful to select the import option.
By the way, professional developers become very proficient with installing/uninstalling/configuring development tools and working through the inevitable issues that occur. Be careful and methodical when resolving conflicts and you will acquire confidence and valuable software developer skills.

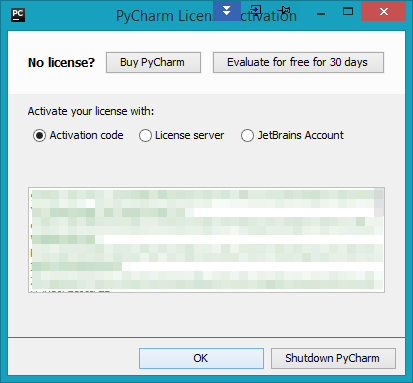
Note: the example below demonstrates using an activation code to activate the license of your recent PyCharm installation. However, if you have a current and validated JetBrains account, I recommend using your login credentials to activate the installation. Simply select "JetBrains Account", supply your credentials, and Pycharm will be activated.
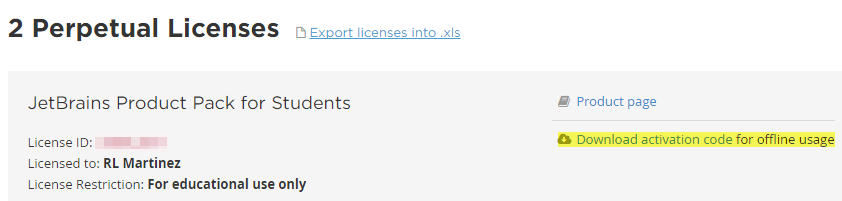
If you encounter difficulties using login credentials to activate the installation or if you prefer to use an Activation Code to activate, follow the next steps. On the JetBrains site, navigate to your Licenses page and click 'Download activation code'. The activation code is a very long code that looks like a private encryption key. It will be downloaded to a .txt file. Open that .txt file and Ctrl-a to select all then Ctrl-c to copy.
Ctrl-v to paste the activation code in the textarea. Instead of the Activation code, I recommend first attempting the simpler JetBrains Acccount path. Select JetBrains Acccount and that should confirm your license status. Select OK.
I like the Darcula theme so I make the selections as shown. Note that the settings can be changed later.
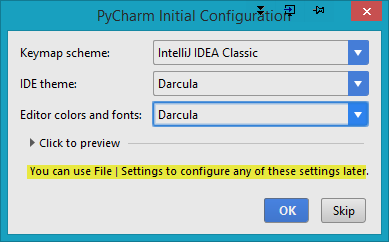
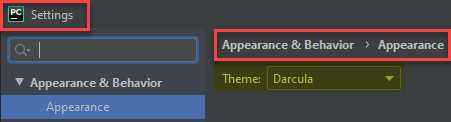
To change from light to dark or vice versa after installation, navigate to File | Settings | Appearances & Behavior | Appearance.
For the theme to take effect, select Restart Now when prompted.

Create our First PyCharm Project
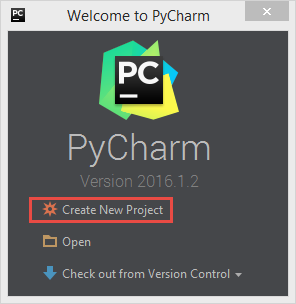
Select Create New Project.
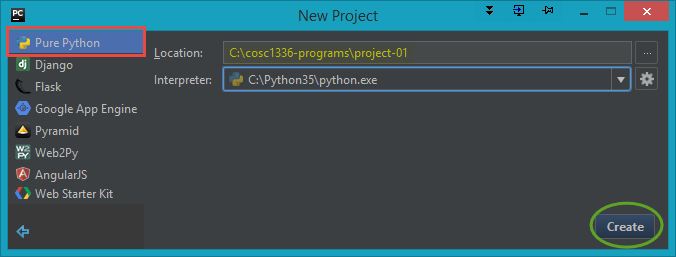
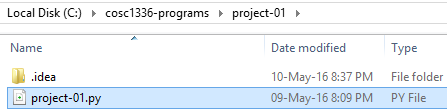
Select Pure Python and change the location to C:\cosc1336-programs\project-01.
Open File Explorer, create a copy of ex-4.py, and move that copy to the project-01 folder.

Go to the project-01 folder and change the name of ex-4 - Copy.py to project-01.py.
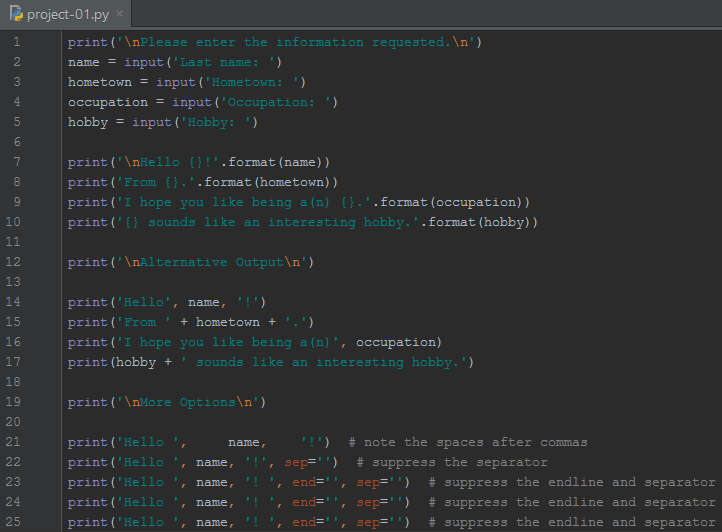
Go back to PyCharm, click the arrow next to project01 to expand, double-click project-01.py to open it and see how the file looks in PyCharm. Observe that PyCharm will offer suggestions for making the code compliant with PEP 8 Style Guide for Python Code (PEP - Python Enhancement Proposals).
I recommend making the corrections advised by PyCharm (PEP 8 settings). For example, PEP 8 likes a space after the # for inline comments. It also recommends four spaces for indentation. You may elect to disregard the PEP 8 power but at some point you will likely be assimilated. Realistically, the coding shop that you join will have relevant policies.

After the PEP 8 changes have been made.
Here is the same code using the light theme.
Configure PyCharm Settings
If you want to make changes to the IDE theme go to File | Settings | Editor Colors & Fonts | Font and 'Save As...' to copy the theme since the system themes are read-only.

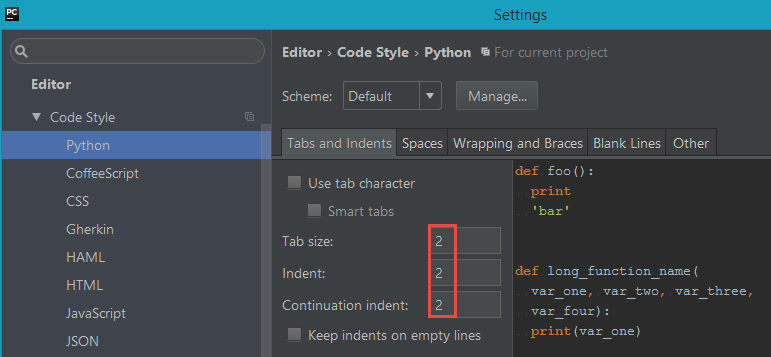
You can change Tab and Indents as shown. However, since the PEP 8 considers four spaces to be the standard, I suggest you do not change these settings.
Set line numbers to show under Editor | General | Appearance.

Set 'soft wraps' under Editor | General.
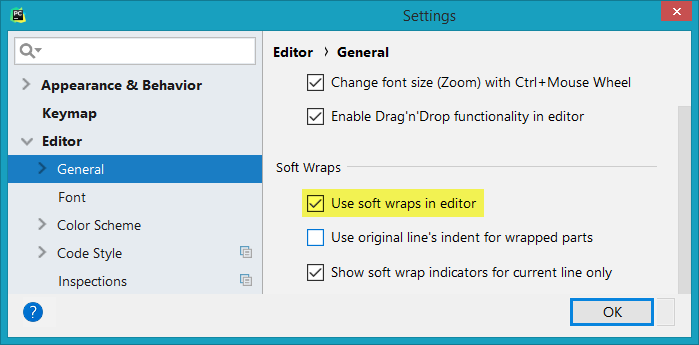
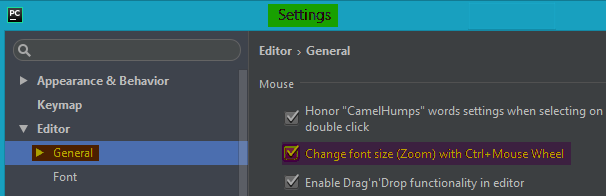
It is quite convenient to use the mouse wheel to zoom (in/out).
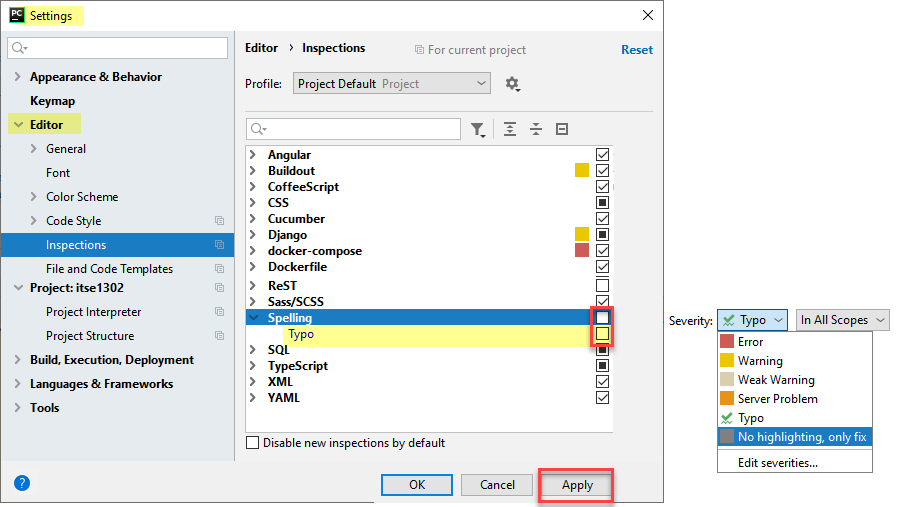
Personally, I like to disable spellcheck in code. Another option is to set the Severity setting to "No highlighting, only fix".
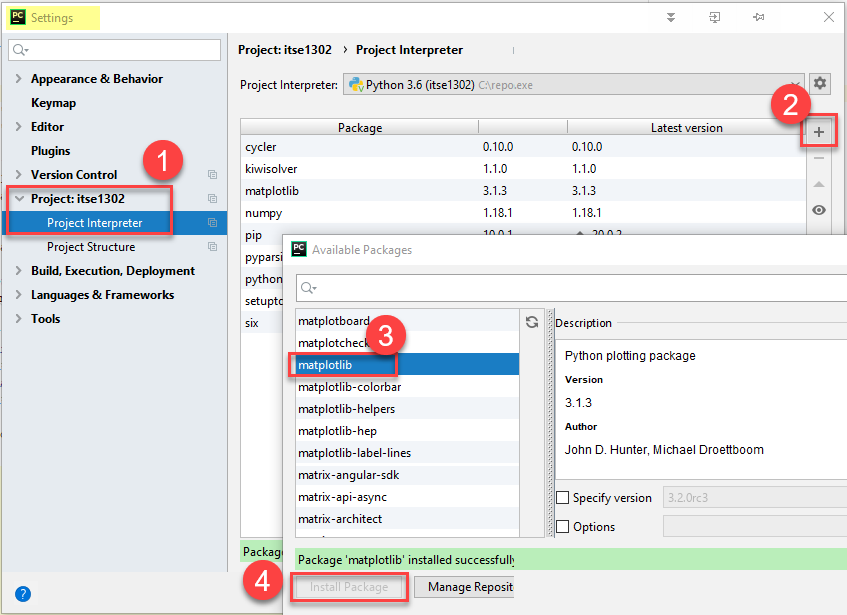
Follow the steps shown to install packages when they are required in your work. File | Settings | Project: <projectname> | Project Interpreter | + sign | Select package name | Install Package. The installation process downloads the package from the web. You will need to then import the items you want to use. More on importing in the File I/O & Modules chapter.
If you are using PyCharm to develop data science projects, the dialog below may appear. Clicking "Use scientific mode" will change to that layout. As stated in the dialog, "Scientific mode is a tool window layout optimized for data science work." Scientific Mode can also be enabled/disabled by selecting View | Scientific Mode.
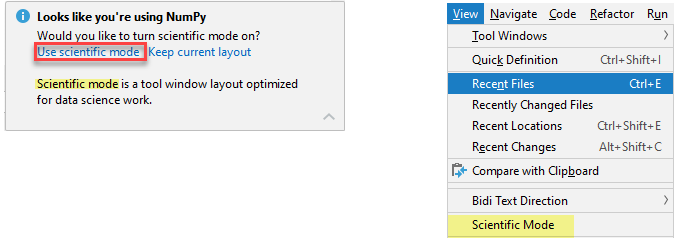
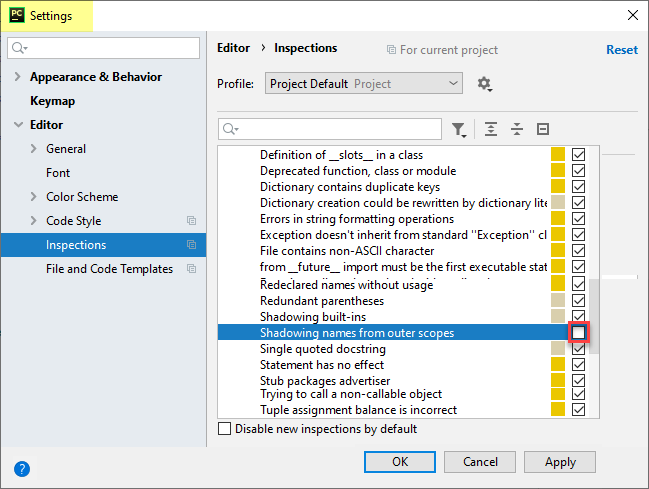
When migrating substantial code blocks from Jupyter Notebooks to PyCharm, there will be many weak warnings for Shadowing names from outer scopes.You may want to disable that warning to make it more efficient to achieve the ![]() .
.
Running Your Program
Run the program by selecting Run | Run 'project-01'. Note: As with almost all modern software, there are multiple ways to accomplish the same task. For instance, projects can be run by the Run menu method, or shortcut key combinations, or by R-clicking the filename in the project window and selecting Run.

It is a good idea to become familiar with multiple techniques. And, you will by working with the tool. As you gain experience with PyCharm, favorite methods are likely to emerge. To Run/Debug a file, I suggest R-clicking the .py file while it is open in the editor and selecting Run or Debug (if debugging). This is the best/fastest approach I have found to ensure you are running the file you want to run.
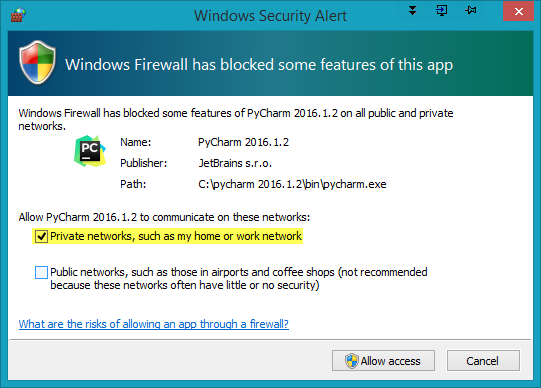
When you first run a program you may see the dialog box below. I recommend the 'Private networks...' selection.
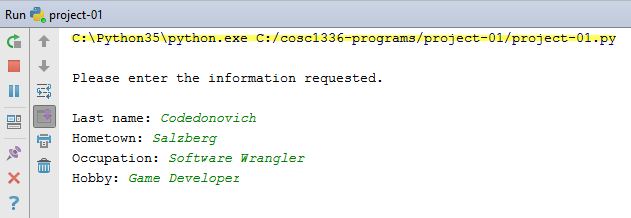
When running console-based (output to the console) Python applications from within PyCharm, the output appears in a console window within PyCharm. Notice the highlighted line is the same as that used in the console.
Upgrading to New Version of PyCharm
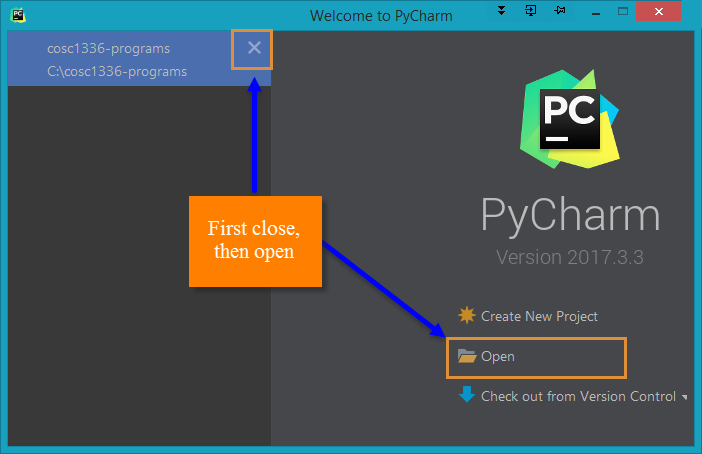
After some upgrades, PyCharm may have difficulty locating project files and you may receive errors when trying to run or debug. If so, close the project(s) and reopen as shown and that should repair the file disassociation issue. If that does not work, make a copy of all of your Python work and then create new project(s).
Avoid Renaming the Project
Just one more thing for this chapter. Suppose you want to rename your project. Since PyCharm makes multiple references to the project name, we cannot simply rename the directory in which the project is stored. We use a technique called refactoring which, in this case, means to rename and update the references with the new name.
Note: The steps shown below are for demonstration purposes on a simple project. Renaming a project should be avoided. Choose a good name at the beginning and stick with it. Or, create a new project with the desired name and move the files to the new project.
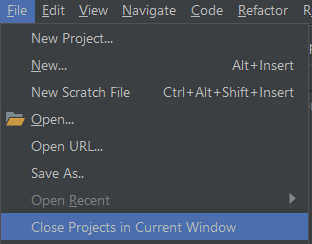
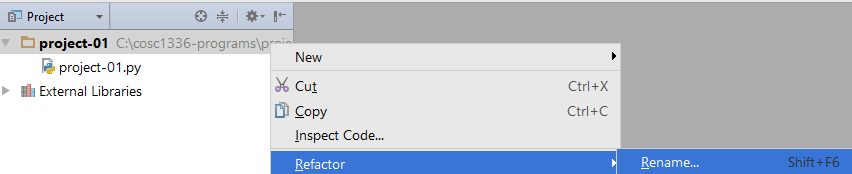
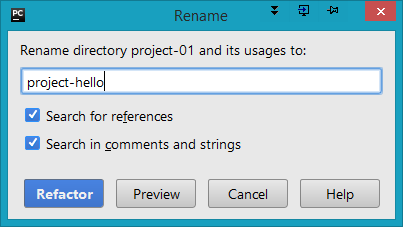
R-click project-01 in the project window and select Refactor | Rename.
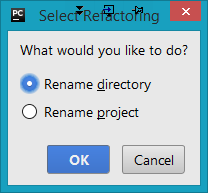
We want to rename both the directory and the project. Sometimes it works best to rename one before the other. So, if you receive a 'cannot rename' error, restart PyCharm and try again with the project or directory (select the other one from the previous attempt that failed).
Provide the new name and select Refactor.
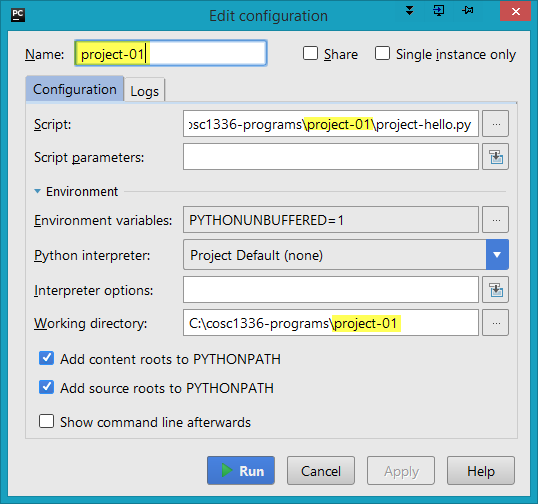
The first time you run a project with refactored project and directory names, you will need to make the additional configuration changes as shown. The dialog below should appear after selecting Run the first time. Change the project-01 settings to project-hello.
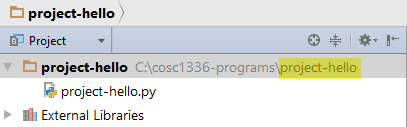
Now we have a project named project- hello in a directory of the same name.
You should note from the steps above that changing a project name is involved and error prone. There are multiple settings in multiple configuration files that must be changed which makes the task problematic. Notice the error that appeared after closing and opening a refactored/renamed project.

Given the tenuous process of refactoring/renaming, it should be avoided if at all possible. In the case above, it would have been easier and less susceptible to errors if we had created a new project and copied the .py file to that new directory. Even better, make a suitable name choice at the time of project creation.