

Using the Command Line Script Mode
Foreword
In the previous chapter we saw how the interpreter can be run in interactive mode. In this chapter, we will consider a few examples of running the interpreter in script mode. To get started, we will write the programs in Notepad++ and then save the file with a .py extension. When ready to run, we will open a command window and start the Python interpreter which we will use to run our programs.
Our First Python Program File
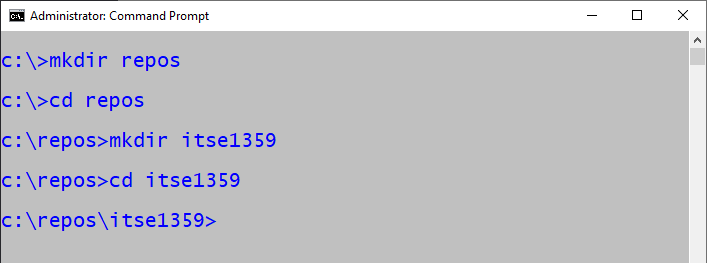
Let's begin by creating a location to store our programs. Use File Manager to create the directory C:\repos\itse1359 as shown.

Or, you can use the command window to create the directories as shown. mkdir makes the directories and cd changes to that directory.
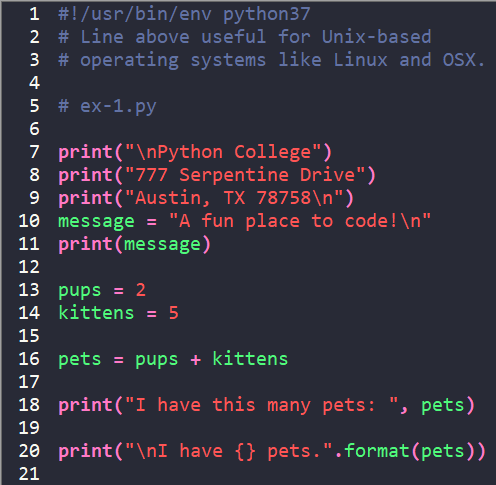
Open Notepad++ and enter the code listed in the example. Save the file as ex-1.py (for exercise 1). Save it to the C:\repos\itse1359 directory.
Lines 1, 2, and 3 begin with a hashtag which means they are comments and are ignored by the Python interpreter. However, line 1 has a special meaning when running on Unix-based operating systems like Linux and Mac OS. The combination of '#!' is referred to as 'she-bang'. That line enables the file to be run by simply typing 'ex-3.py' instead of 'python ex-3.py'. Some developers even use it on Windows systems as a way to quickly identify the file as Python and for the benefit of the line being in place when/if it is ported (moved/copied) to a machine running a Unix-based operating system.
Notice that we assign a string to a variable named message on line 10 and print message on line 11. Starting with Python v3, format() like shown on line 20 is recommended for output when working with strings.
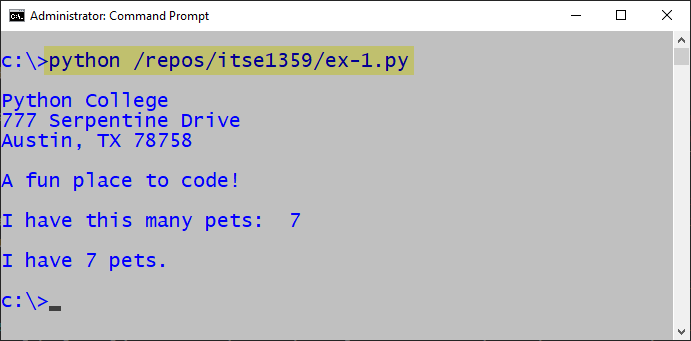
To run the program, open a command prompt and type: python /repos/itse1359/ex1.py <ENTER>. See the output below and verify that it agrees with the ex-1.py code listing.
Be Careful with Compact Syntax
Python introduces a compact way of declaring and assigning variables that may appear unusual to developers experienced with other languages. Note the abbreviated syntax on lines 20 and 23 in ex-3.py. On the surface it may seem simple enough. However, there is a twist of which you should be aware. It is covered below.
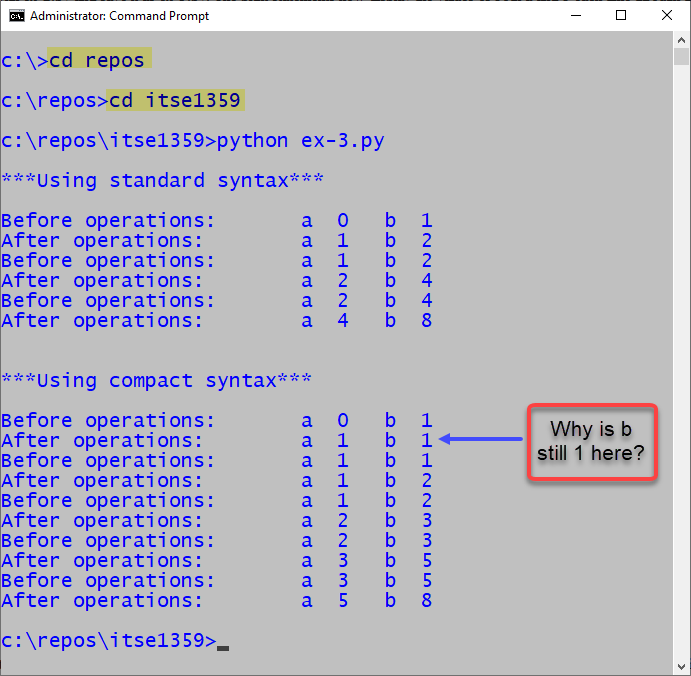
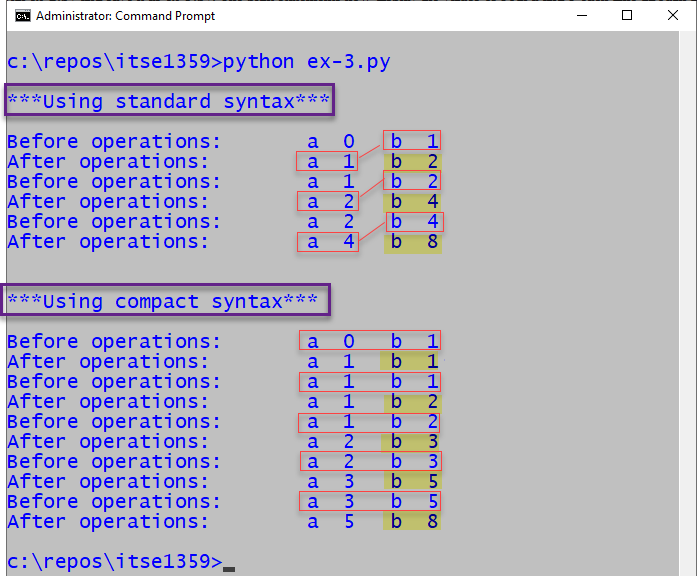
Now code ex-3.py in Notepad++ or your text editor. Lines 11-15 and 21-24 represent loops which will be covered more completely in an upcoming chapter. However, let's look at the basic operation at this point. The first while loop will be executed while the condition of 'b < 8' is true. Each time through the loop, the value of a is set to b and b is set to a+b. Notice in the output that b is set to 1, 2, 4, 8.
Like in the first while loop, the second while loop will be executed while 'b < 8'. On line 20 compact syntax is used to assign a the value of 0 and b the value of 1. In this case, compact syntax is not an issue.
In the second loop, each time through the loop a is set equal to b and b is set equal to a+b. These operations appear identical to those listed on lines 13 and 14. However, there is a big difference as is shown in the output.
In the second loop, on line 23, b is assigned the value of a+b before a is assigned the value of b. That is NOT the behavior in the standard loop above where b is assigned the value of a+b after a is assigned the value of b. Therefore, on line 23, in the expression a+b, a has the value of a from the previous iteration of the loop (the old version of a). Look at first two outputs of b from lines 22 and 24. The values are 1 and 1. The reason the second output of b is 1 is that a is still 0 at that point so 0+1 is 1. Again, the first time through a+b on line 23 has the value of 0+1 which equals 1 and that is what is assigned to b.

Before running the program, change the directory to the location where your exercise files are stored. I typed 'cd repos' and then 'cd itse1359' to change to the c:\repos\itse1359 directory. See the highlighted lines in the output. Once in the directory, only the filename is required after 'python' instead of the full path of the file.
Notice in the output that both a and b change values more quickly in the first loop than the second. Be sure you understand this example.
Observe in the annotated version of the output below that, when using standard syntax, the after operations version of the variable a is used in the expression b=a+b which is as expected.
However, notice that the before operations version of the variable a is used in the expression b=a+b which might be a surprise.
Print Alternatives
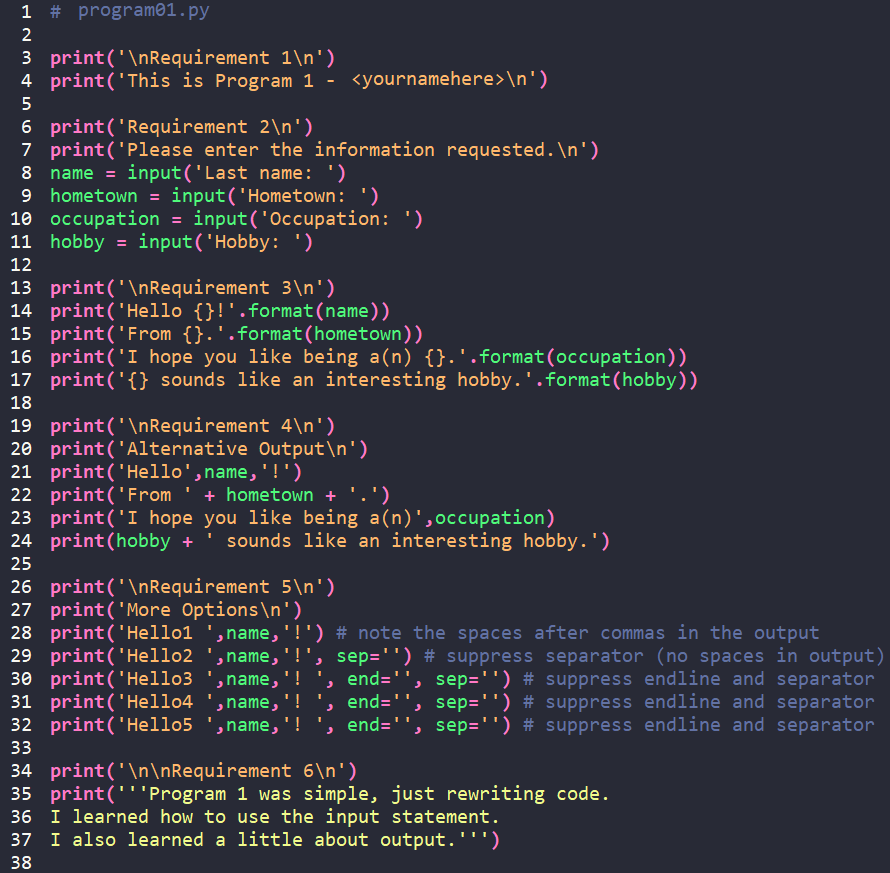
Let's write one more program using Notepad++ and the command line interpreter. Code program01.py as shown below. There is a new concept on lines 8-11. The built-in function 'input()' is being used to obtain input from the user. The input from the user is stored in appropriately named variables. Lines 14-17 so the use of replacement fields (the {}) and the format() built-in function.
Lines 21-24 use a combination of commas and the + sign to produce output. Notice how an undesired space (produced by the comma) precedes the ! in the output of line 21. Also note how lines 22 and 24 use the + sign as a concatenation operator to tie the output together.
Note the spaces after the commas that are output from line 28. Line 29 suppresses the separator and therefore the ! is adjacent to the name.
Lines 30-32 demonstrate suppression of both the separator and end-of-line characters. Notice the effects in the output. Also, notice how "Requirement #'s" are printed in the output to identify the requirements that are being met. See Blackboard for information about program requirements.
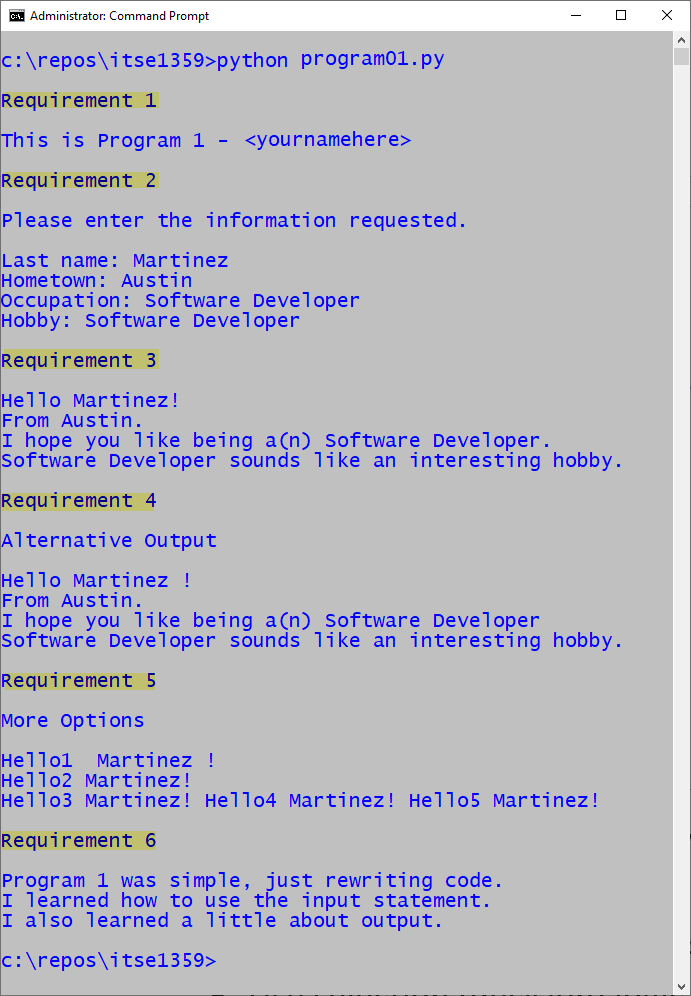
Observe the output.
Command Line Arguments
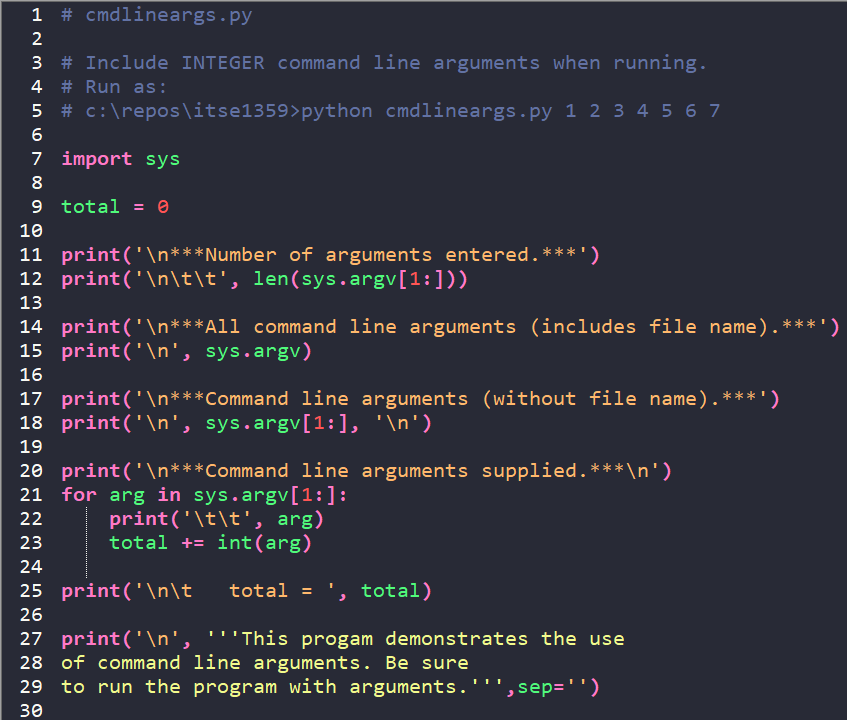
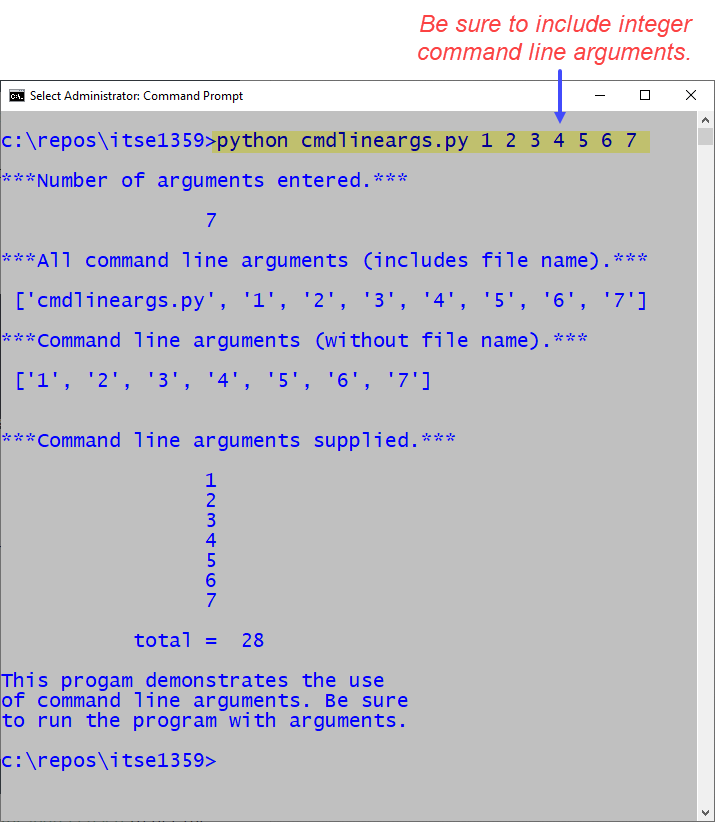
The code below demonstrates the use of command line arguments. The sys module is imported on line 7 since it is required to process the arguments. Command line arguments are entered into a list of strings which includes the filename. The output from line 15 shows the filename. However, when we don't want to process the filename, we use sys.argv[1:] to skip the zeroeth element of the list and start with the first. This technique is shown on lines 12, 18, and 21. On lines 21-23, a for loop is used to process each argument entered. Each argument is added to total which is diplayed on line 25.
Note that if arithmetic operations are to be performed on the string input, the string must be converted to the appropriate numeric type. This conversion occurs on line 23 where each string is converted to an integer prior to being added to the total.
Run cmdlineargs.py as shown.
Remember to code the examples and ensure you see and understand the output as displayed.