

Getting Started with COSC1337
Which verson of Visual Studio?
Visual Studio has many versions: Team Foundation, Ultimate, Enterprise, Professional, and Community to name a few. Personally, I would download Enterprise from your Microsoft Imagine account before the end of the semester for later use. However, for this course, I recommend the "Community" version due to its reduced resource requirements.

During installation, I recommend the workloads selections as shown.

Select the VC++ environment settings. The Dark theme is preferred if working at night. Both settings can be changed later as shown in the "Configuring Visual Studio" section.

Configuring Visual Studio
I recommend the changes below to make Visual Studio a more effective tool. These settings are optional, and in time, you will develop your personal preferences.
Open Visual Studio and access the Options dialog box under the Tools | Options menu.
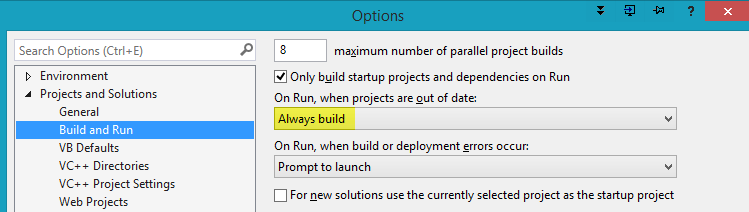
This setting will build and compile your project automatically after selecting run or debug.
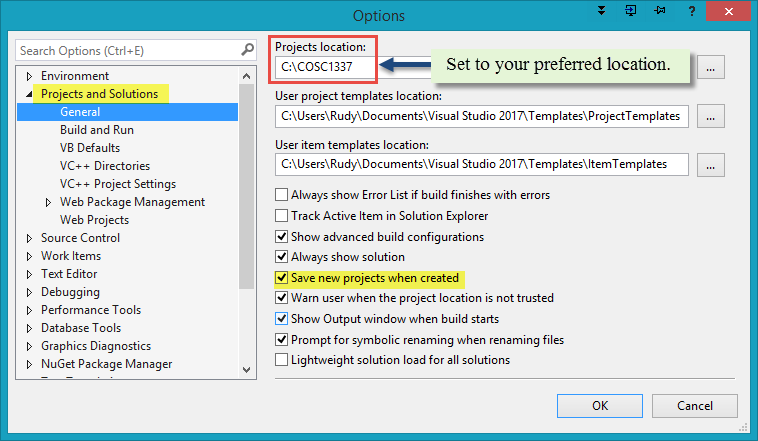
Select the default location of your projects and the “Save new…” box as shown. Note: Even though MSDN describes the "Projects location:" as being the default location of new projects, the "last used" may override this setting.
Set your preferred color theme. The dark IDE themes have been popular since ~2010 and I prefer them. However, in class, this theme does not project as well on the screen as the lighter themes.

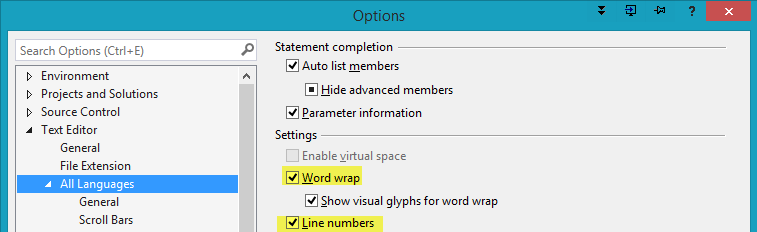
Set word wrapping and display of line numbers.
Set the tab and indentation to 2 spaces. This is a personal and common preference. The one detractor to this setting is Python's PEP 8 which specifies 4 spaces. But hey, that's Python.

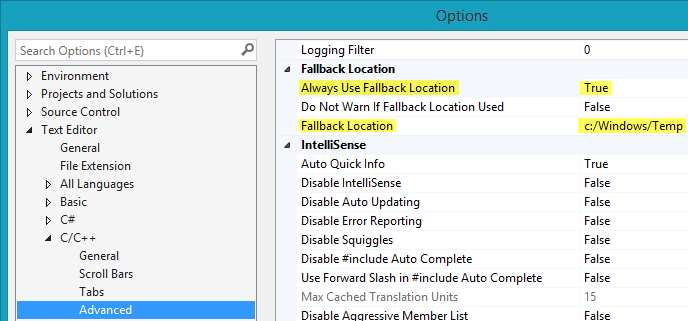
Set location of SDF files. SDF files are large files which store information for Intellisense (code completion tool).
Changing the General Environment Setting
When Visual Studio is opened the first time after installation, a prompt appears to select the general environment setting. The choices are Visual C++, Visual C#, Visual Basic, etc. Naturally, choose the language with which you plan to work the most. Perform the steps below if you need to make a change later.
On the Tools menu select "Import and Export Settings". Select "Reset all settings".

Good idea to save your current settings in case you want to revert back.

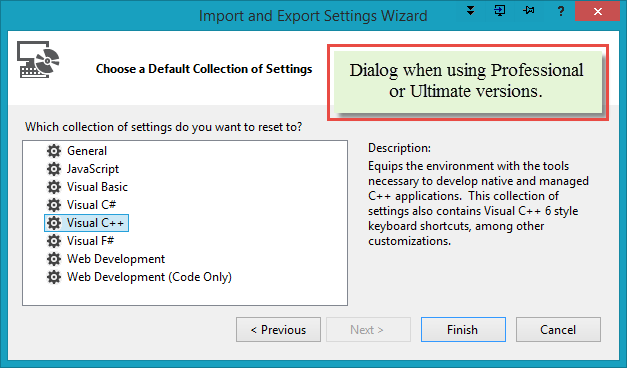
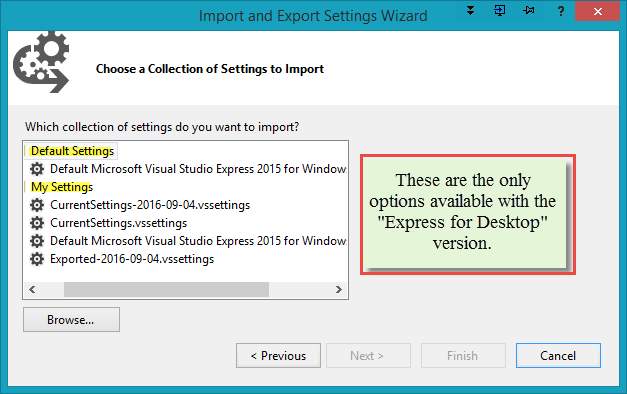
This is what the next dialog box looks like when using the Community, Professional, or Ultimate versions of Visual Studio. The Express for Desktop version options are shown in the second dialog. Select the new language setting.
Note: with the "Express for Desktop" version of Visual Studio, the language settings do not exist.
Change confirmed.

Creating the HelloWorld Project
Now we are ready to create the HelloWorld project.
Create a new project and make the following selections.

R-click Source Files in the Solution Explorer. Select Add | New Item…

Make the following selections. I prefer to name the file “main” that contains the “main()” method. Only one file in a C++ project may contain a function named main(). It is the function that runs when the program starts.

Add the code below to the main.cpp file.

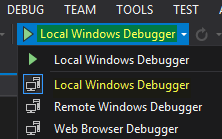
Select “Local Windows Debugger” from the main menu to run. Or, press F5.
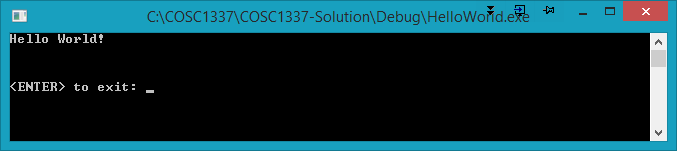
Notice the output in the command window.
Important Note:
Obtaining user input using "cin >>" or "cin.get()" leaves a newline character (\n) on the input buffer. This will cause problems if a "cin.get()" or "cin.getline()" follow. For instance, if your code uses "cin >>" or "cin.get()" prior to lines like lines 11-12 in the HelloWorld project, you will need to preceed lines 11-12 with "cin.ignore()" to consume the newline character. See chapter 3 in the textbook for more on this topic. Also see the links "Keep the Console Open" and "Input Buffer Operations" at the Resources tab on the left for code examples.
Compressing and Submitting
After you build/run your project (or select debug), a .exe executable file is produced. Locate your .exe program file which should be the same name as your project. In the example above it will be HelloWorld.exe. The default location of the .exe file is in the $SolutionDir/Debug folder. $(SolutionDir) is the name of your solution directory. Pay particular attention to the directory locations highlighted in the examples below. The solution directory is COSC1337-Solution. The project directory is HelloWorld. These were set in the "New Project" dialog above.

Copy your .exe file and your .svg flowchart file to your project directory. In this example, the solution directory is COSC1337-Solution and the project directory is HelloWorld. In addition to .cpp, .h, and other files required by your programs, your project directory MUST contain both the .exe and .svg files. Not submitting the compressed project directory with the .exe and .svg files will result in loss of credit for the assignment.

Now we are ready to compress the project directory and submit it to Blackboard.
Navigate to the directory where you saved the project (HelloWorld) and R-click the project folder | Send to | Compressed (zipped) folder.

The .zip file created by the compression operation is the file that should be submitted (uploaded) to Blackboard. HelloWorld.zip is the compressed project directory. You will submit compressed .zip files for all program assignments in the C++ courses.

Optional - Creating Multiple Projects within One Solution
There are two different approach to project management within Visual Studio for the course:
- Create a solution for each assignment and compress and upload the project directory for each solution. This was essentially the approach demonstrated with the HelloWorld project above.
- Create one solution and create a project for each program assignment within that one solution. Compress and upload the appropriate project when complete with each assignment. Containing multiple projects within one solution makes it more convenient to copy and move files between projects while working in Visual Studio. The steps below describe this process.
R-click the COSC1337-Solution to add another project.

Make the following selections.
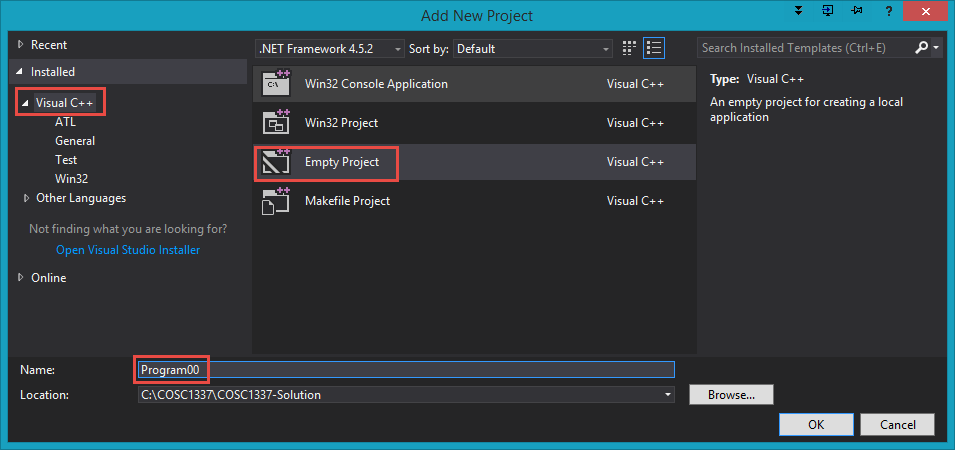
This image shows three more projects that have been added to the COSC1337-Solution.

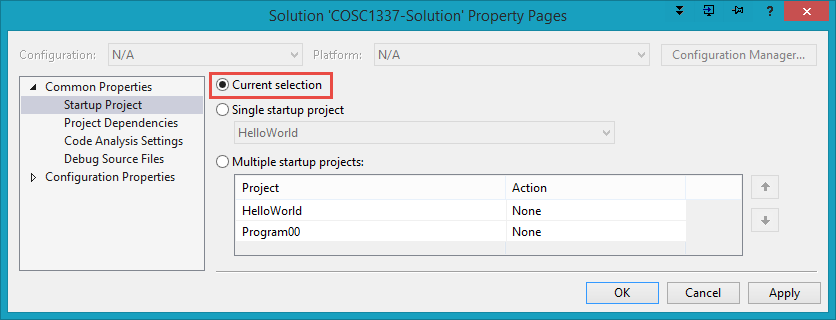
It is convenient to select a project and have it be the one that runs when F5 is pressed (debugging). To make this setting automatic, in Solution Explorer, R-click the solution | Properties | Current Selection as shown.
Congratulations! You are ready to have a spectacular semester in COSC1337. Your success is up to you. Make it a great semester.