

Database Application with C#
Foreword
The majority of modern computing solutions utilize a database to accomplish common computing tasks. A database is required for standard operations such as storing user data, presenting product information, supporting online store activities, inventory controls, etc. C# can connect to a variety of databases including the current dominant three: Oracle, MySQL, and SQL Server. Since C#, VS, and SQL Server are all Microsoft products, the most seamless and performant connections are offered via SQL Server. VS ships with a small SQL Server database engine identified as Local that makes it efficient to develop and test database applications from within VS without requiring additional installation, setup, and maintenance of database server software.
Database Terminology
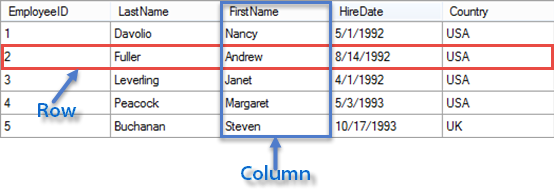
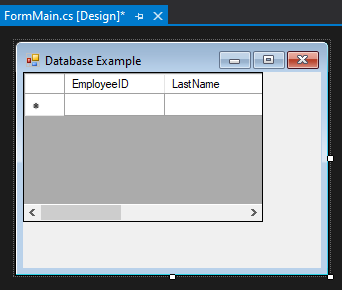
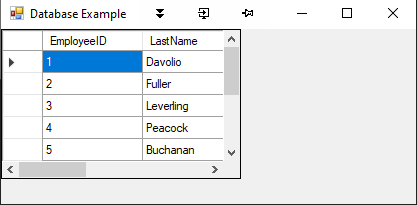
Let's cover just a few database terms before implementing an application. It is important for all professional software developers to possess a working knowledge of database terminology and organization. The fundamental component of the database is the table. Tables contain rows and columns of data. Rows are also known as records. A sample record is enclosed by the red box.
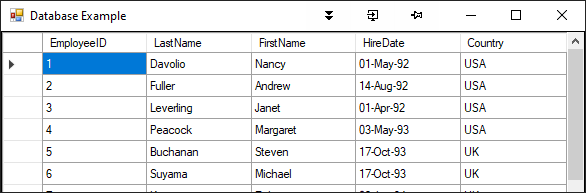
Columns are the vertical cuts of data and are also known as fields. In the table below, EmployeeID, LastName, FirstName, HireDate, and Country are columns in the table. An example column (FirstName) is enclosed in the blue box. The individual data elements are in cells. Davolio, Steven, and USA are examples of cell contents.
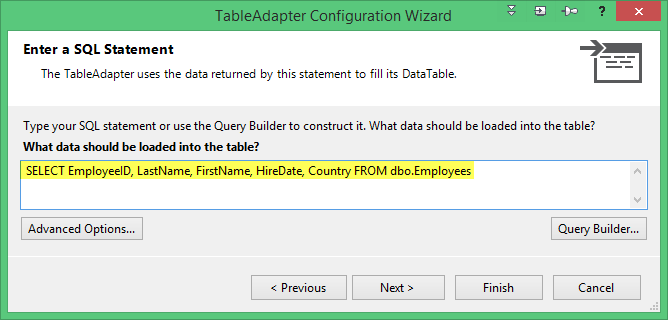
The four most common code interactions with a database are create, read, update, and delete. Each of these operations is accomplished by queries (questions) issued to the database. The queries are submitted in the form of SQL (Structured Query Language) statements. The CREATE and INSERT statements are issued to create databases, create tables, and insert new data into tables. The SELECT statement is used to read from the database. The UPDATE and DELETE statements perform their respective operations. The window below shows the SELECT SQL statement (highlighted) that was automatically generated by a wizard. We will walk-through wizards in the sections below to produce the DatabaseExample application. You can see that the SELECT statement reads the field data from the Employees table which produced our example table above.
Most databases in production applications today are known as RDBMS (Relational Database Management Systems). The Relational in RDBMS refers to the relationship between tables. When two tables together contain data required to answer the query, a relation is established between the two tables to facilitate the operation. Establishing a relation between tables is referred to as joining the tables. The three main relation types are one-to-one (1:1), one-to-many (1:M), and many-to-many (N:M). The relation types are described in the table below.
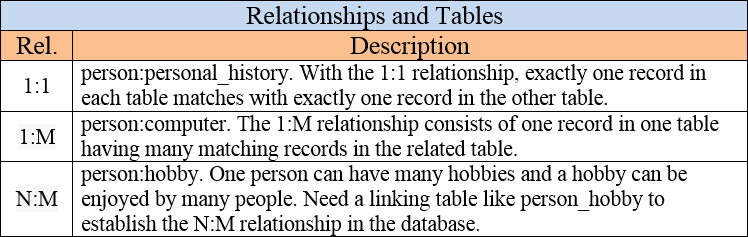
To establish relationships between tables, the tables contain what are known as a Primary Key (PK) and Foreign Key (FK). Tables typically have a parent:child association in which the parent table contains the primary portion of the data of interest and the child table contributes a bit less. For instance, in the 1:M relation described in the example above, there is a person table with relevant information about the person and a computer table with information about the types of computers the person owns. The person table would be considered the primary table and the computer table would be the child table.
Both PKs and FKs consist of one or more fields from their respective tables. By definition, the PK must be unique and cannot be NULL. The PK in a parent table is used to connect to the FK in the child table. For instance, the personID field could be a PK in the primary table and an FK in the child table. The personID field would establish the link (relation) between the two tables.
The PK in the primary table supplies the link to the FK in the child table. The PK and FK fields are not required to have the same name however that is usually the case. The data types and content of the PK and FK fields must match. When a relationship has been established between tables using the PK and FK constraints, referential integrity will be enforced by the database. This means that a record in the parent table (the table with the PK) cannot be deleted from the parent table if a matching record in the child table (the table with the FK) exists. Doing so would produce an orphan record (a record in the child table with no related record in the parent table).
The converse condition is another aspect of referential integrity. That is, a record cannot be inserted in the child table unless a related record (with the appropriate PK) exists in the parent table. These checks are supplied automatically by the database engine when a PK:FK relationship is established. The checks are important reasons for establishing the PK:FK link.
Database .MDF File Example
In this project, we take advantage of a powerful and flexible data control in VS called the DataGridView. With this control, we can quickly establish a pre-defined connection to a database and populate a table based on custom SQL specifications that we provide. All of this can be accomplish by responding to questions in one or two wizards.
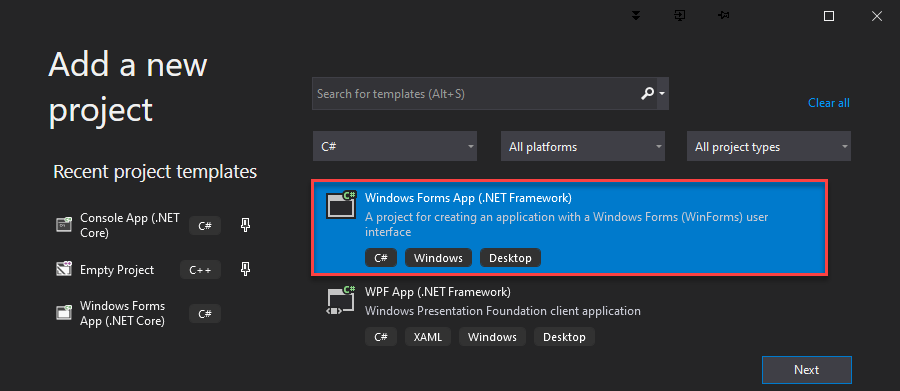
Let's get started by creating a new application named DatabaseExample using Windows Forms (.NET Framework). Note: It is important to select .NET Framework and not .NET Core for this example since the DataGridView control is not available in Core v3.0. The May2020 .NET Core Forms Designer release notes can be viewed here

Rename Form1.cs to FormMain.cs by R-clicking on the file in Solution Explorer | Rename and choosing to refactor. Change the form Text property to Database Example.
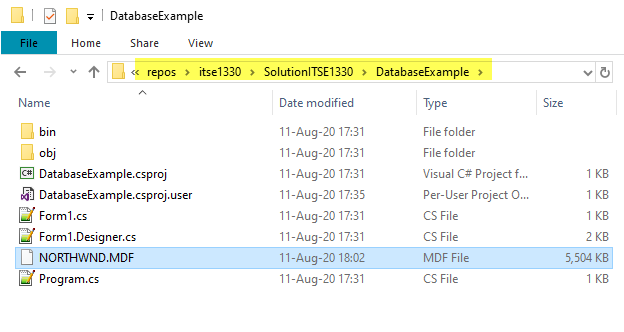
Download the NORTHWND.MDF SQL Server database file from the Resources tab in Bb and move the file to your project directory as shown.
After you move the .MDF file to your project directory, you may receive a notice like shown. It means that the data sources required for SQL Server support need to be installed. Select OK.
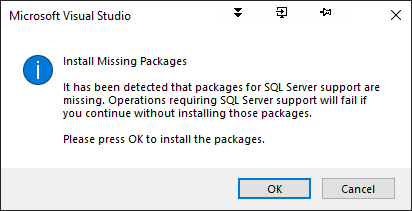
Select Install. VS will close and restart automatically.

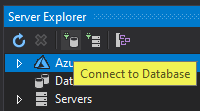
Select Server Explorer on the View menu to open the Server Explorer window. Click the Connect to Database icon as shown. When that selection is made, VS guides the developer using a wizard to configure the connection. A wizard is a series of guided steps designed to simplify and improve a process.
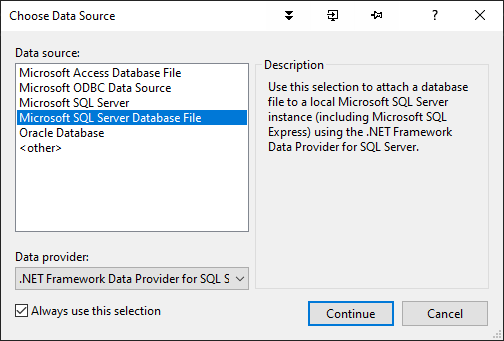
Now we want to select the source database that we will be using. Select Microsoft SQL Server Database File and then Continue.
Choose Browse... in the Add Connection dialog and select the NORTHWND.MDF database file where you stored it in the project directory.
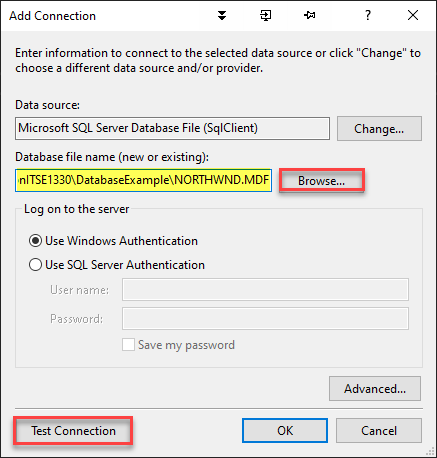
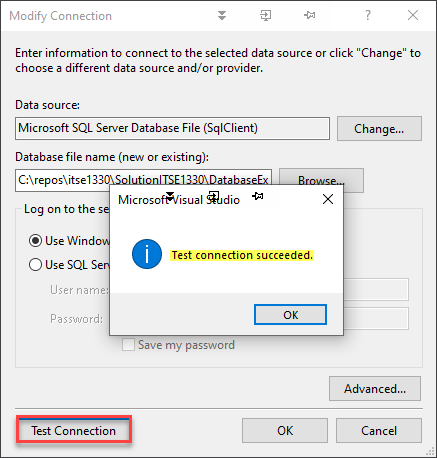
Select Test Connection to ensure you are able to connect to the database. If the test succeeds, skip to the After Successful DB Connection section. If the test was not successful, continue with the next steps.
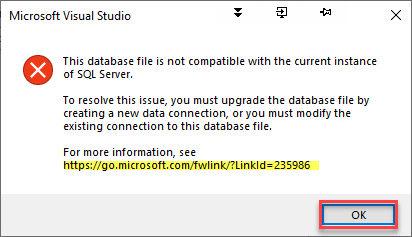
If your test connection to Northwind DB was not successful, it can likely be corrected in at least one of the two ways below. The first is to follow the steps at the link highlighted. However, I recommend selecting OK in this dialog box which should take you to the next dialog box shown.
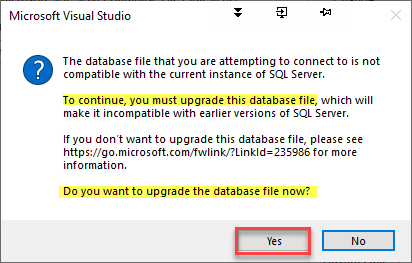
If presented with the option to upgrade the DB like shown, select Yes.This is option to automatically upgrade was added to VS in addition to the alternative at the URL from the previous dialog box.
After Successful DB Connection
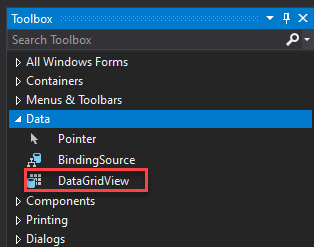
D-click on FormMain.cs in Solution Explorer to open it in design view. In the Toolbox, under the Data tab, D-click a DataGridView control to add it to the form.
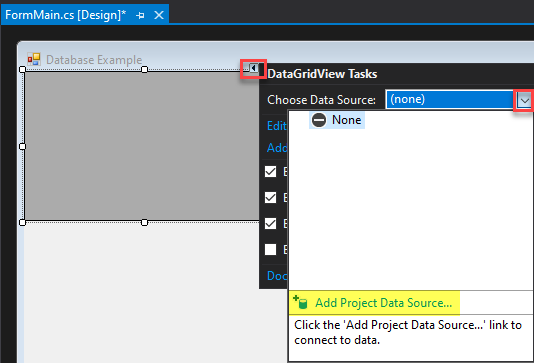
The DataGridView Tasks window initially appears. Click the icon in the red box to show that window at any time. Select the dropdown menu on the right (blue box) and then Add Project Data Source. Like the connection above, configuring the DataGridView is simplified by a wizard.
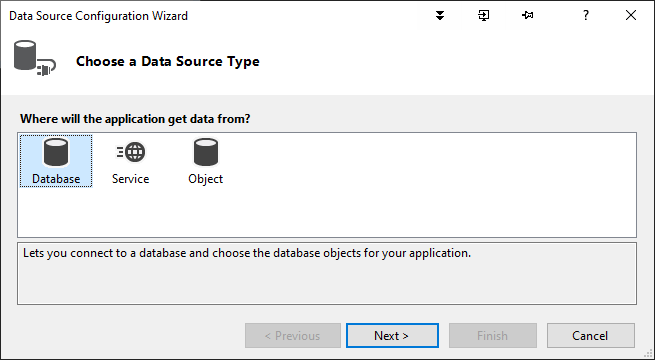
Select Database for source type and then Next.
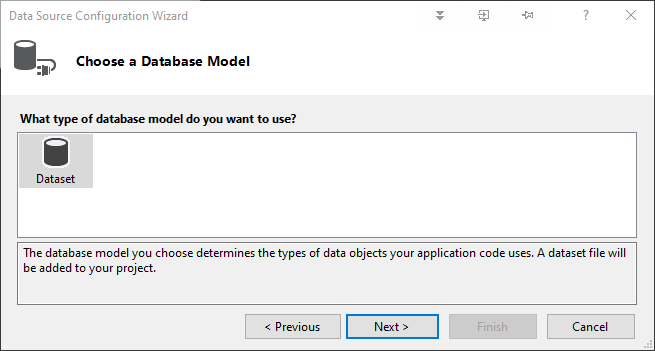
Select DataSet for the type of model. Since Database was chosen for the source type, Dataset is the only model option. Select Next.
If we had not established the connection, we could select New Connection to do so now. Since we established a Data Connection above, NORTHWND.MDF should appear in the connection options. Note the highlighted connection string. This is used internally by the DataGridView to connect to the NORTHWND database. If we were connecting directly via code, we would use this Data Source connection string in our code to connect to the database. Select Next.
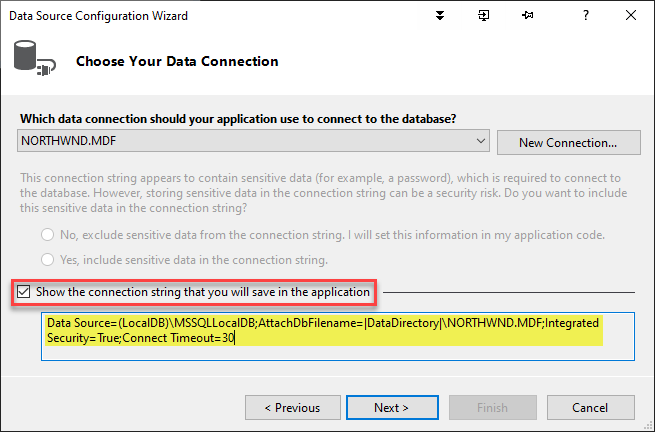
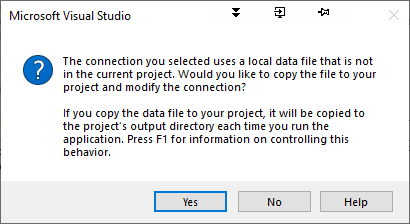
In the dialog below, Select Yes to copy the NORTHWND.MDF file from its original location to the project folder. Note that if Yes is selected the connection string from above will be updated to reflect the new location of the file.
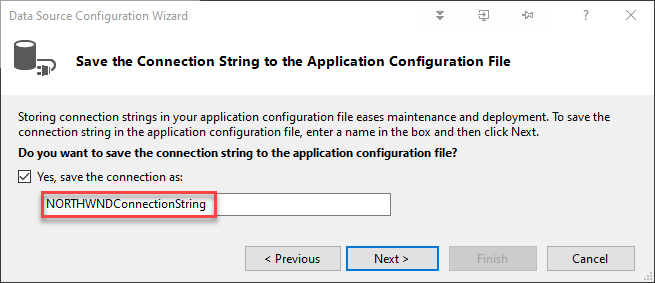
Select Next to save the connection string with the supplied name or change the name as you like. Select Next.
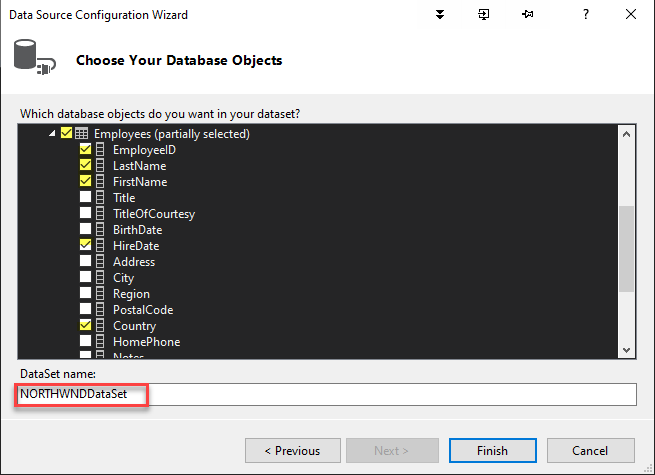
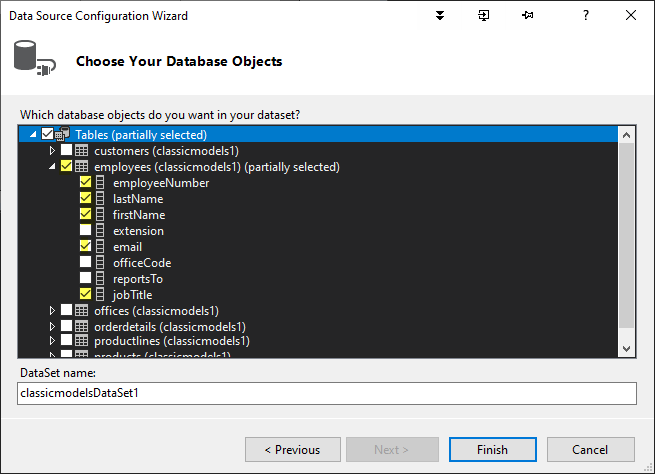
In the Choose Your Database Objects window, make the following selections: Tables | Employees | EmployeeID, LastName, FirstName, HireDate, Country. These are the columns from the database that will appear in our DataGridView control. Note that there are a number of columns in the Employees table and we are only selecting five to keep the DataGridView output simple. The default DataSet name is fine. Select Finish.
Design view opens again as shown.
Run the application to see the DataGridView in action. Notice the scroll bars. It would be nice to remove the horizontal scroll bar to offer a better presentation for the user when the application is running.
In the Properties window, set to Alphabetical listing to make the settings that follow a little easier to locate.

Make the following DataGridView property adjustments: AutoSizeColumnsMode - Fill, Dock-Top. Then set the FormMain Size property to 600, 200. Run the application. These settings should yield the view below. Now we have a custom view of the Employees table from the NORTHWND database. Using the DataGridView control, we are able to quickly present tabular data based on a queries constructed via wizards.
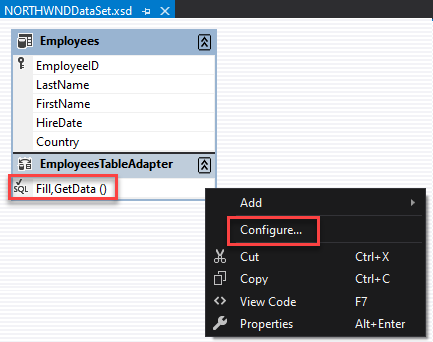
Now we have a custom view of the Employees table from the NORTHWND database. If we need to modify or add queries in the future, D-click XML Schema Document (.xsd) file in Solution Explorer to open it and R-click on the SQL tab as shown. Select Configure... to modify an existing query or Add Query... to add a new one.
Database Server Example
In the example above, we set a data connection to an existing .MDF database file. And, we used the instance of SQL Server that ships as part of Visual Studio. In the example below, instead of directing our connection to an exisiting .MDF database file, we will establish a connection to a running RDBMS and an existing datbase on that running server.
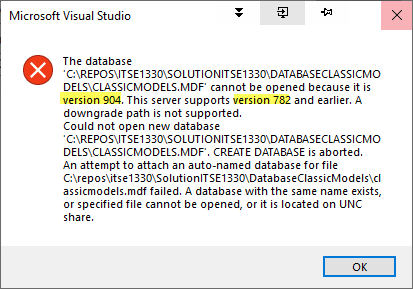
The SQL Server that ships with VS is usually a version or two behind the most recent generally available stable release. For example, in VS 2019 the embedded SQL Server is 2016. However, suppose you have a database built and running in SQL Server 2019. You could try to connect to the .MDF file used by SQL Server 2019. However, when attempting add a new data connection to that .MDF, you will likely encounter the error shown. Notice that I am attempting to connect to a version 904 database (SQL Server 2019) and VS 2019 only supports up to 782. The latest internal database version numbers can be viewed here.
By the way, this section is optional. You will need to install SQL Server 2019 (SS). After installing SS, open your local Windows Services and stop the two services shown. I have three versions of SQL Server installed and you can see the three pairs of services. Stop your SQL Server and SQL Server Agent services.
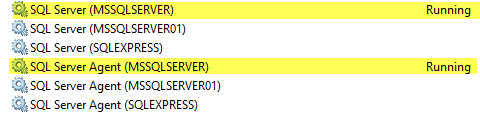
Open your local Windows Services app and start the SQL Server and SQL Server Agent services you just stopped above.
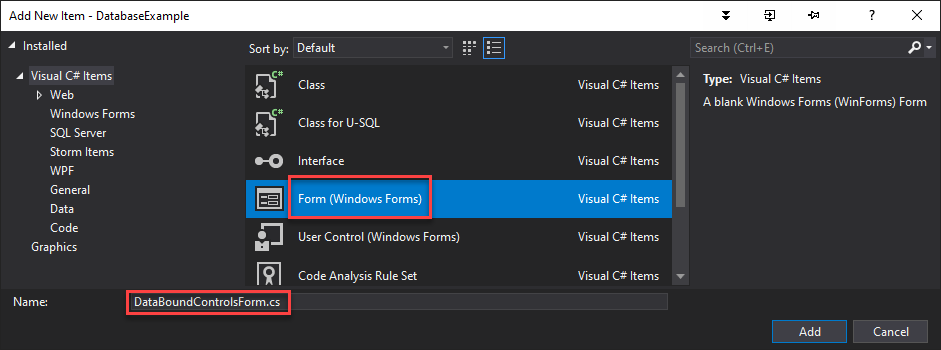
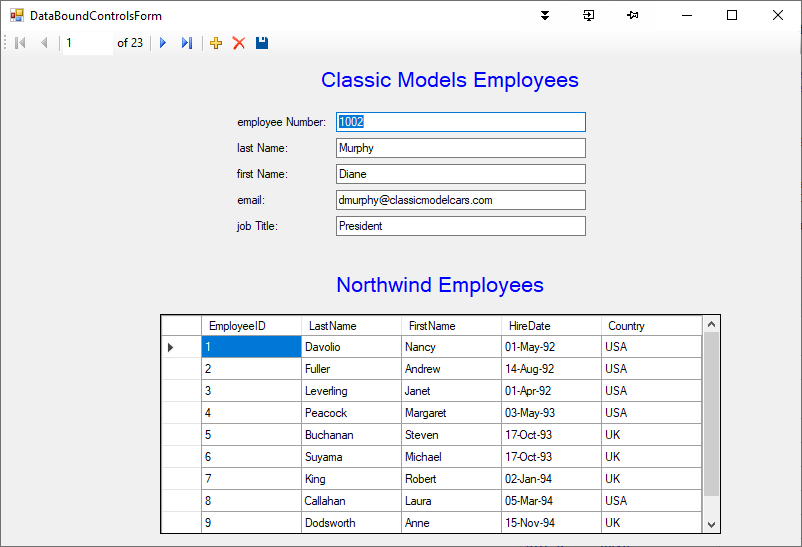
In VS, Add a new Windows form named DataBoundControlsForm to the DatabaseExample project.
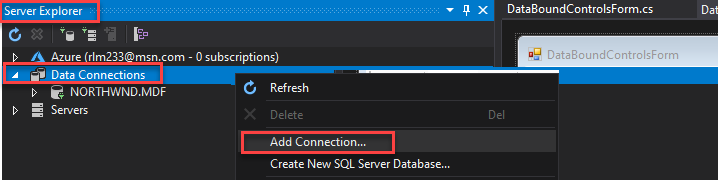
In VS | Server Explorer | R-click on Data Connections | Add Connection...
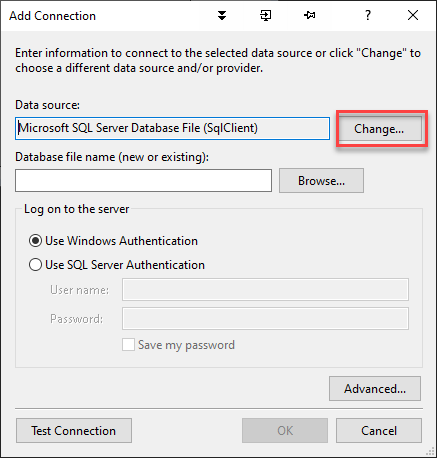
Select Change...
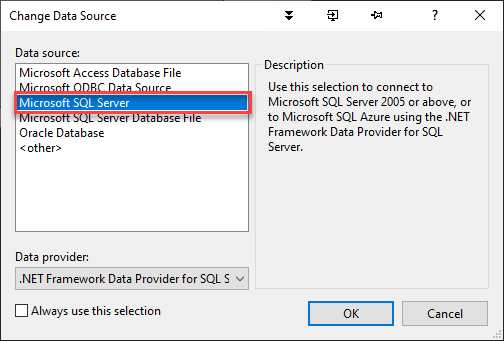
Select Microsoft SQL Server | OK
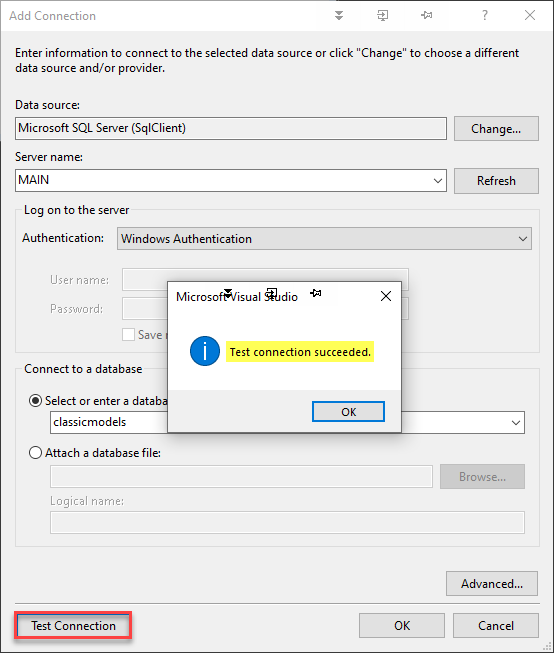
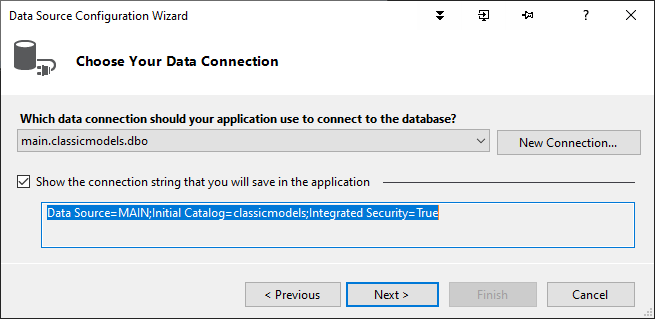
Enter your Server name which should be MAIN by default. After entering your server name, the Connect to a database dropdown should display the available databases on your Server. Select classicmodels.

Select Test Connection and you should see the Test connection succeeded dialog box appear. Now we are ready to add a data source.
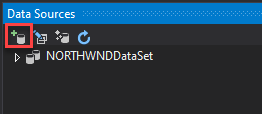
In VS | Data Sources | Select the Add New Data Source button.
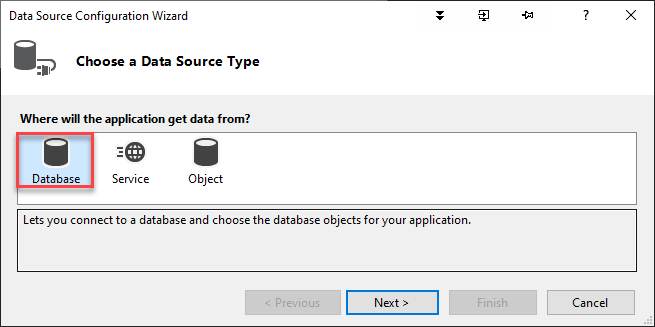
Select Database | Next.
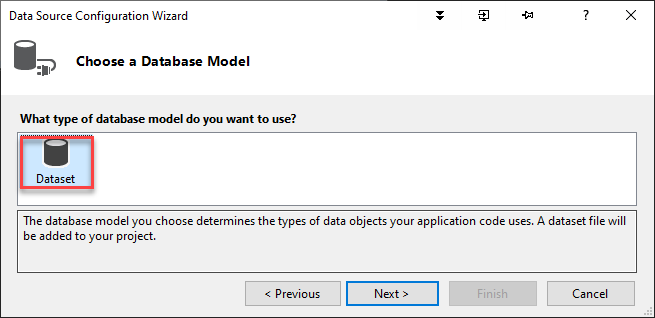
Select Dataset | Next.
Select classicmodels for your connection | Next.
Select the employee table and the fields as shown | Finish.
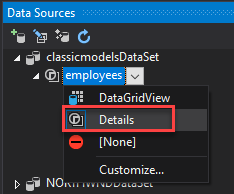
You should see your new data source appear in the Data Sources window. Use the dropdown next to employees to set the Details view. Then, drag the employees table in Data Sources onto the DataBoundControlsForm.
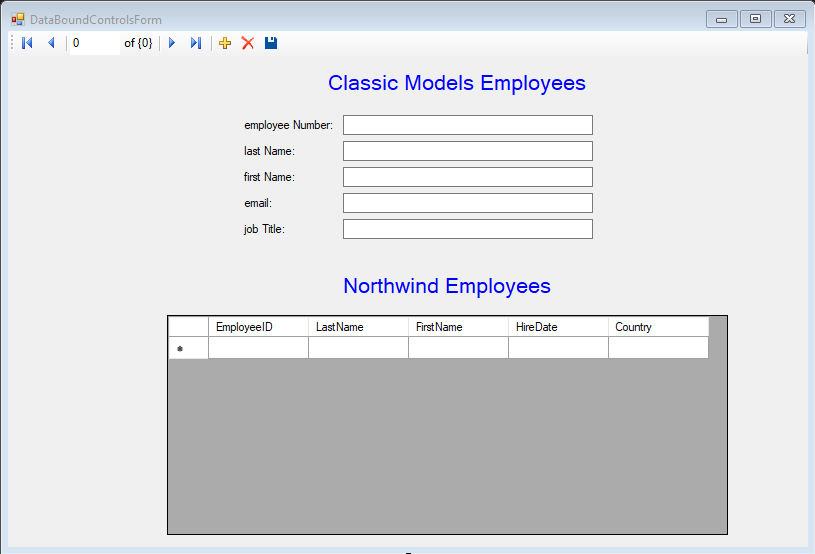
Add a DataGridView and the two labels as shown.
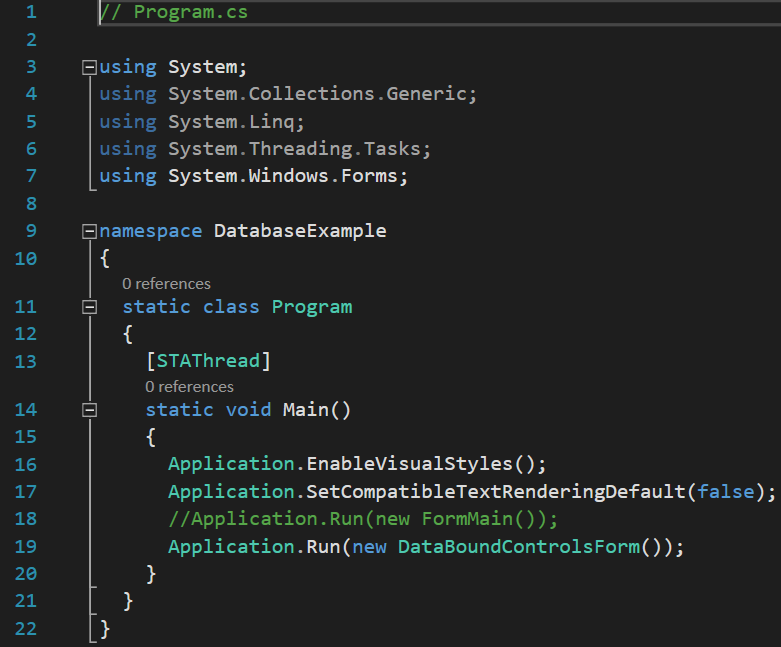
Make the changes to Program.cs as shown on lines 18 and 19.
Run the application to see the data connections, one to a local instance of SQL Server named MAIN and another using the SQL Server within VS.
What's Next?
Congratulations for working through the completion of the course. The next page contains a list of C# resources.