

Visual Studio
Installation
There are a number of Visual Studio (VS) versions available. To view a comparison chart of the various versions and features see here. For this course, we will use Visual Studio Ultimate (Professional or Community are also sufficient). Download and install VS from Microsoft Imagine. See the syllabus for more information about Microsoft Imagine (MI) login procedures. There are two ways to install the application from MI: via an .iso file burned to a DVD or via a mounted image. See MI "Help" for more information about those options. The installation should be accomplished within the first three days of the course since a project is due soon after the course begins. Whenever Visual Studio requires login, use your ACC credentials established through your MI account.
Configure the Visual Studio Environment
In VS, an application is the compiled assembly (the .exe executable) usually given the name of the namespace which is the approach we will take. It is not uncommon to use the words application and project interchangeably. For instance, we have the option of creating "Applications" in the "New Project" dialog.
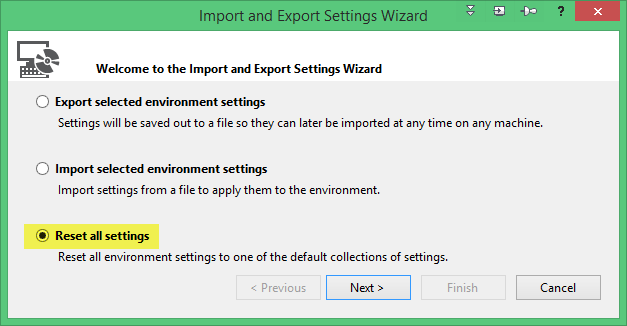
A solution is a container that can hold multiple projects. In many cases, developers will only have one project per solution but it can be convenient at times to include multiple projects within a solution which we will do in a future chapter. Before working our first VS project, let's make a few configuration selections that make working with VS more efficient and enjoyable. When you installed VS, you should have selected the C# environment. However, if you did not, it can be set at any time which we will do now. Select Tools | Import and Export Settings... to see the dialog below. Select Reset all settings | Next.
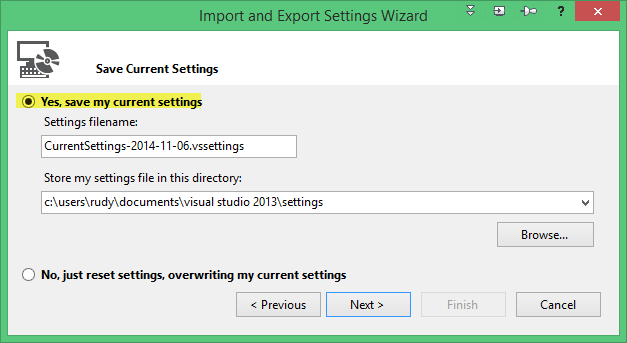
In the "Save Current Settings" dialog, select Yes since it is a very small file and it is a good practice. Select Next.
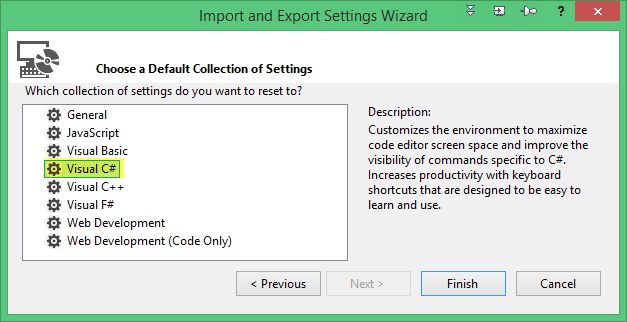
The "Choose a Default Collection of Settings" dialog is the key. Select Visual C# | Finish.
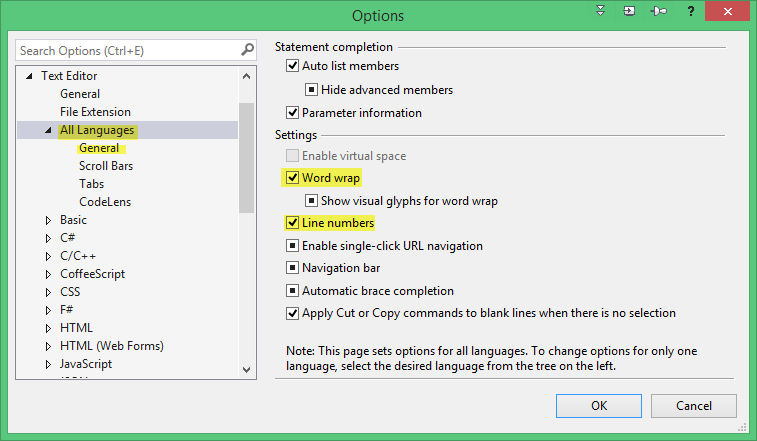
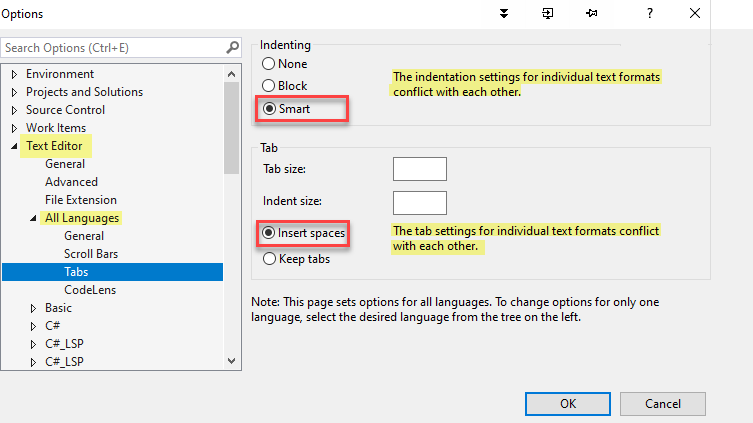
If you have not done so, I recommend displaying line numbers and enabling word wrap. Both are located at: Tools | Options | Text Editor | All Languages.
Another setting that I like to apply is two spaces for tabs. I prefer a smaller setting than the default of four. A notable exception to my preference is with Python. Python strongly encourages using four spaces and IDEs generate warnings when indentation is not set to four spaces. I also suggest the "Insert spaces" setting since spaces are more universally processed correctly than tabs.
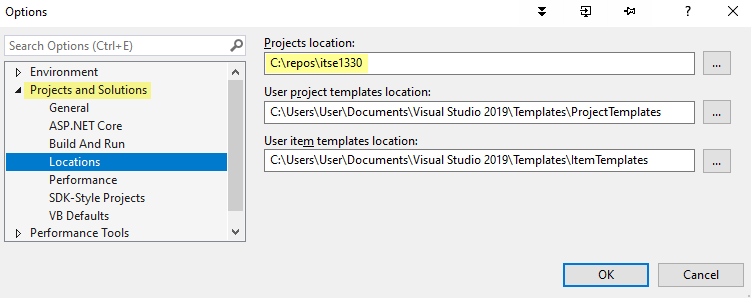
There are two more settings that I recommend in Tools | Options | Projects and Solutions | General. Set the Projects location to the folder where you want projects saved by default. Also, select the "Save new projects when created" option which is not selected by default.
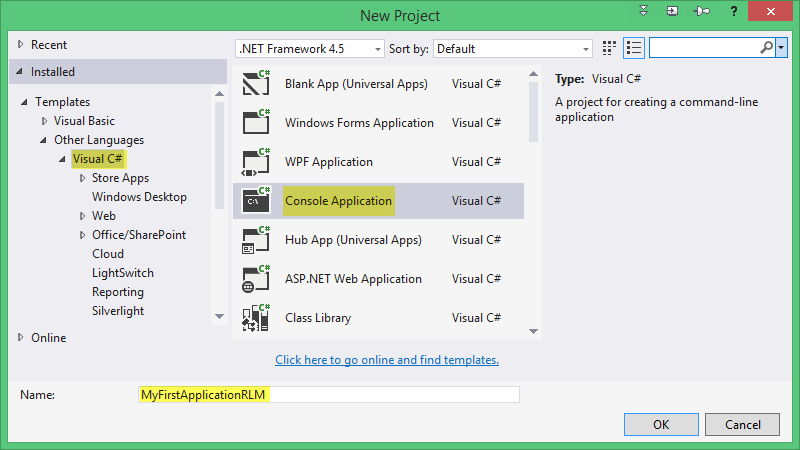
As an aside (no need to try to reproduce the next two dialogs), if the "Save new projects when created" option is not selected as shown above, the save location of the project will not be requested until saving the project for the first time. Notice in the New Project dialog the save location is not yet requested.
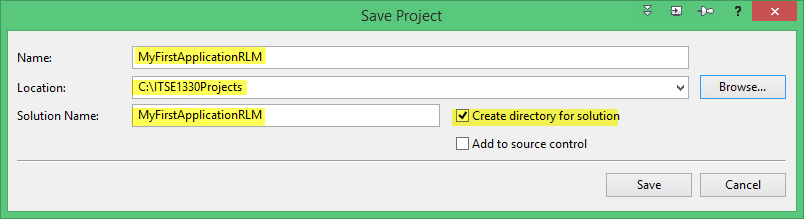
When the project is saved the first time the Save Project dialog will appear. Instead of this approach, since we selected the "Save new projects when created" option, we will specify the save location at the point of project creation which feels more natural than waiting until the first time the project is saved.
My First Application
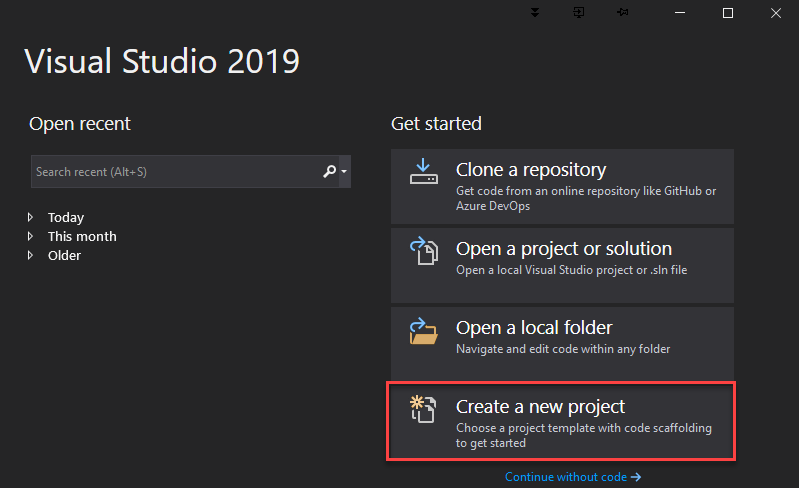
Now we are ready to create our first VS application. Open Visual Studio (VS) and create a new project by either selecting "New Project" on the Start Page or selecting File | New Project.
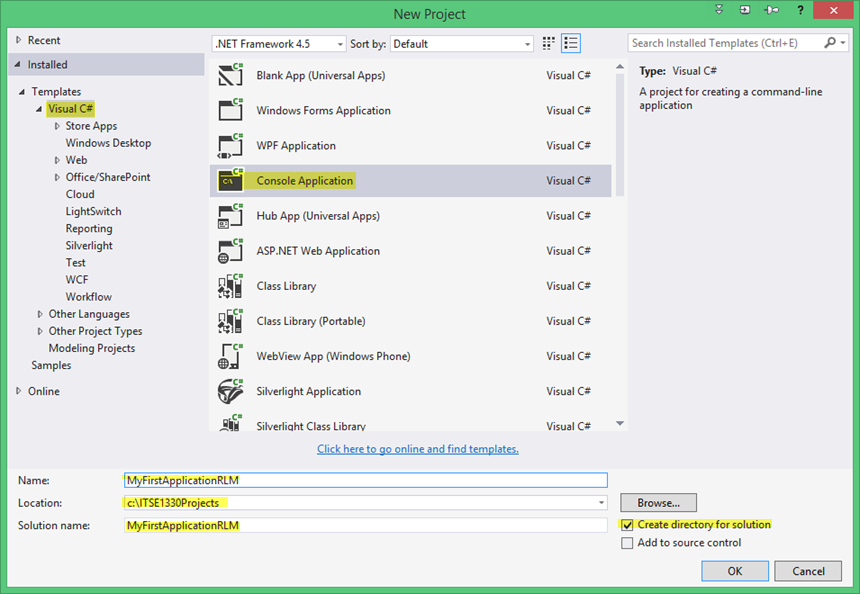
In the New Project dialog make the selections as shown. Name the project MyFirstApplication"your initials" as shown. Notice that the Location and Solution Name boxes are included in the New Project dialog now. The "Create directory for solution" box is checked by default. Leave it checked to create a dedicated directory for the solution. By the way, like Microsoft, I use the words folder and directory interchangeably. Select OK.
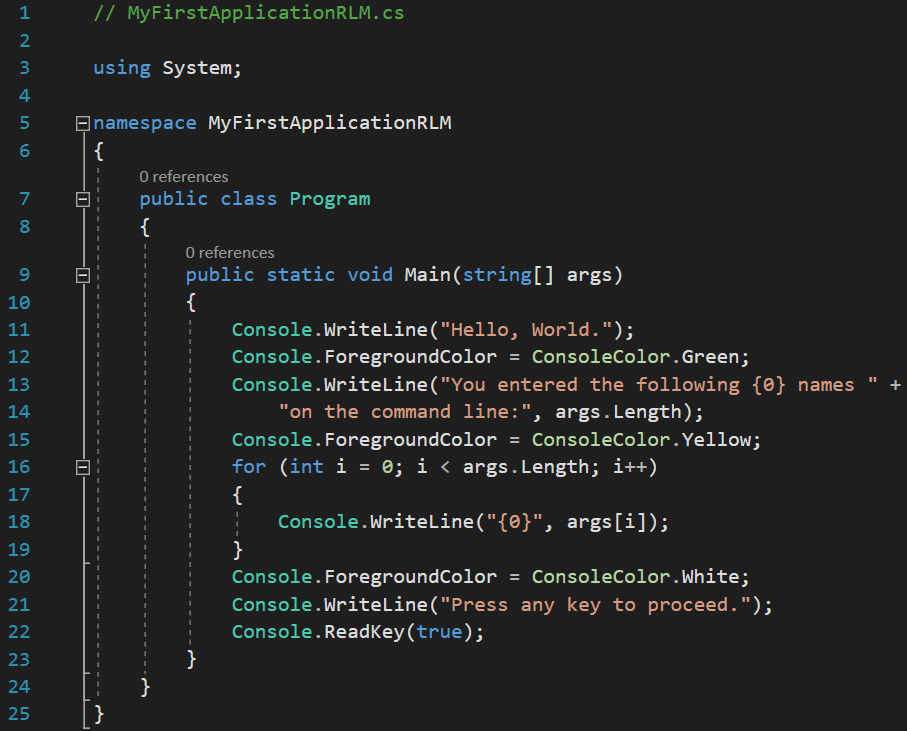
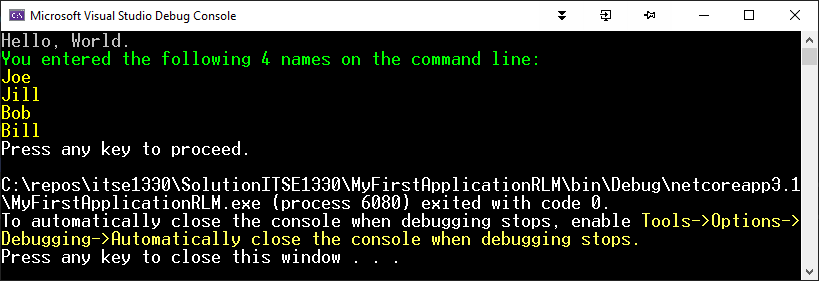
Notice that Program.cs, the class that includes our Main procedure, contains five using statements that VS automatically supplies with a new console application. Let's write our HellowWorld2 code in Program.cs like that shown. Notice that the default file name is Program.cs which includes the "Main" method (the project starting point) and that is also the class name. During this course, we will continue to use Program.cs as the name for the class that contains the Main method. We are then able to more easily identify the class containing Main when we have multiple classes in our project. The project name "MyFirstApplicationRLM" is also the name of the namespace. When we run the application, an .exe assembly is automatically generated with our project name. Notice on lines 14 and 17 the console foreground color (the text color) is changed. To keep the code segments small, most of the code examples in the course do not include console enhancements. However, this is a valuable technique to make the output easier to follow. Students are encouraged to employ various text colors to enhance the console output. More on console text color options here. Be careful though to not degrade readability with color choices. For instance, blue text on a black background can be practically illegible.
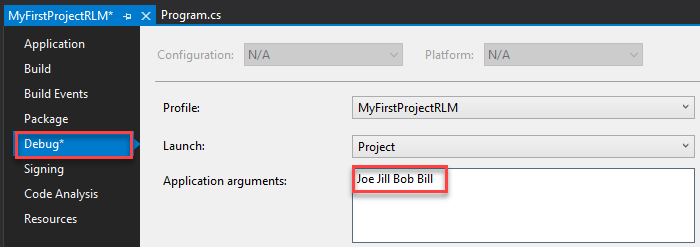
Recall that HelloWorld2 was written to accept names on the command line when the program was started. We accomplish that in VS by the menu Project | MyFirstApplicationRLM Properties or by R-clicking the project name in Solution Explorer and selecting Properties. The Properties window opens. Select Debug and enter a few command line arguments like shown. Select the Save button or use Ctrl-S to save the arguments.
We are now ready to run the application which can be done a number of ways (F5, from the Debug menu, or the Start button). You should see the output below.![]()
Navigate to the folder as shown. The file "MyFirstApplicationRLM.exe" is an assembly which contains the MSIL for the CLR to execute.
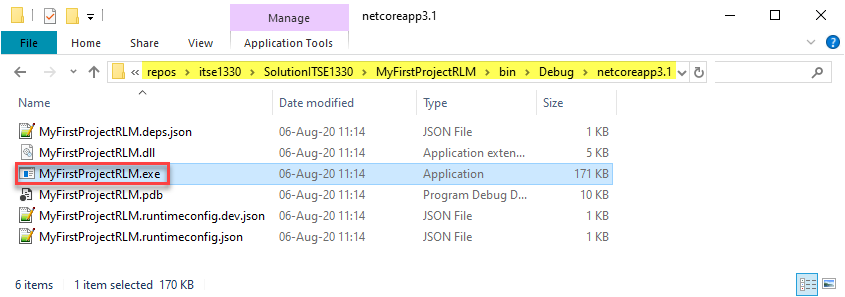
Double-click that file to run the application again. Note that the command line arguments loaded in VS are not recognized since the application is not being run from within VS.

The application .exe will run on any Windows platform with the .NET v4.5 framework installed (specifically the CLR). Again, that .exe can be loaded on another machine and the application will run. The next file in the directory listing is a user configuration file. The remaining three files provide information and support for the VS debugger.
What's Next?
In the next chapter, we consider the fundamental language topics of variables & data types.